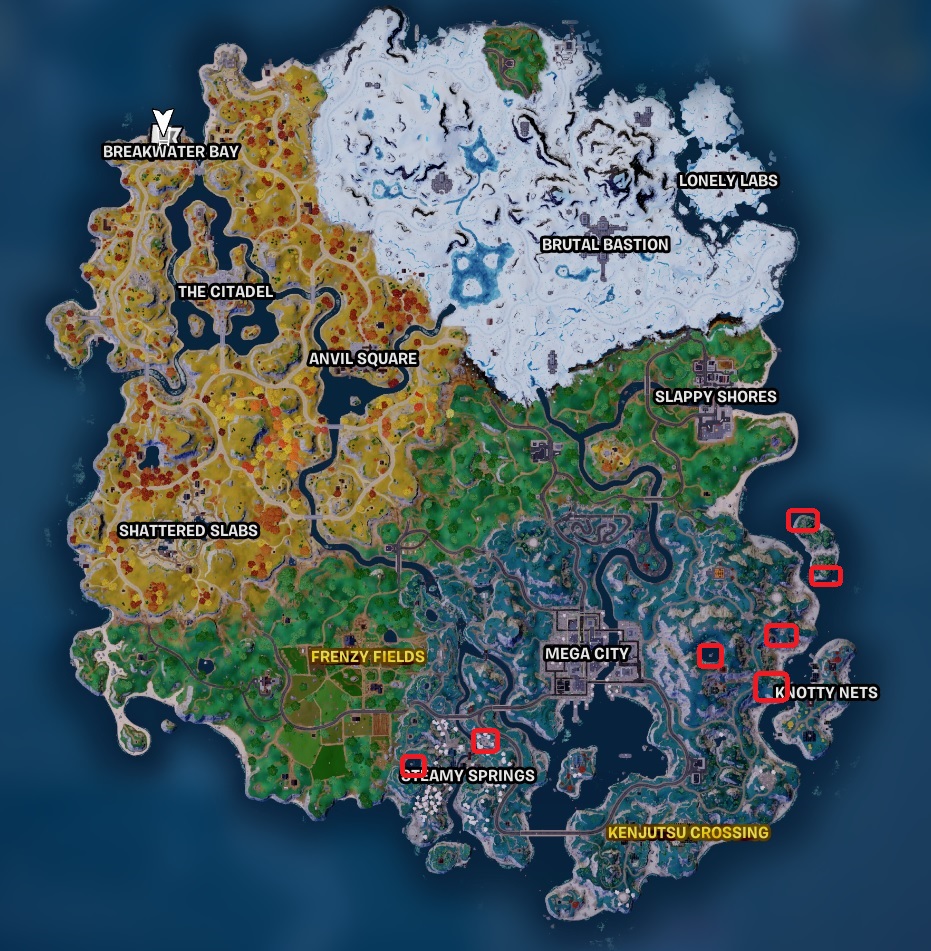
In Chapter 4 Season 2, All the Fortnite Geysers are located in the new area on the Island, around Mega City. Just like in previous chapter geyser quests, the easiest way to complete this quest line is to drop near a geyser, collect some lewt, use geyser and deploy glider for speedy travel
Fortnite Quest – Launch Into The Air Using a Geyser
Fortnite Geyser Locations around Mega City
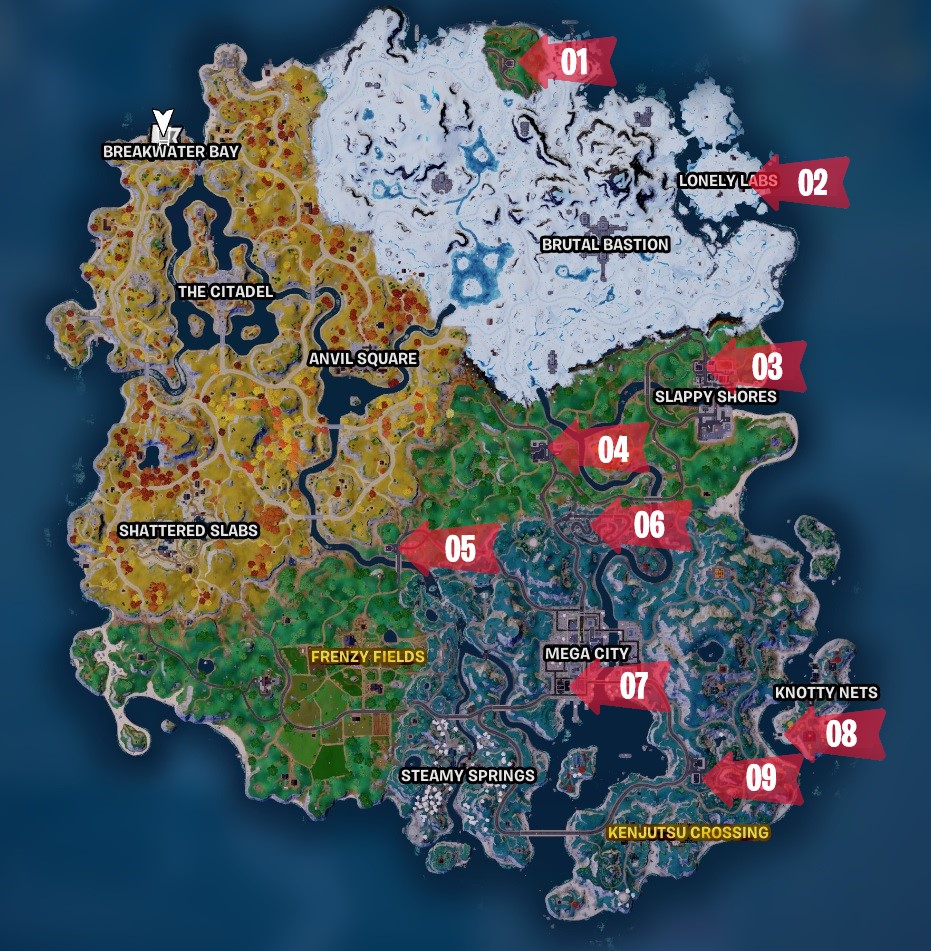
Here are the Locations of the Fortnite Geysers, marked with Red square on the map.
Fortnite Geyser Locations to Launch into the air – Chapter 4 Season 2
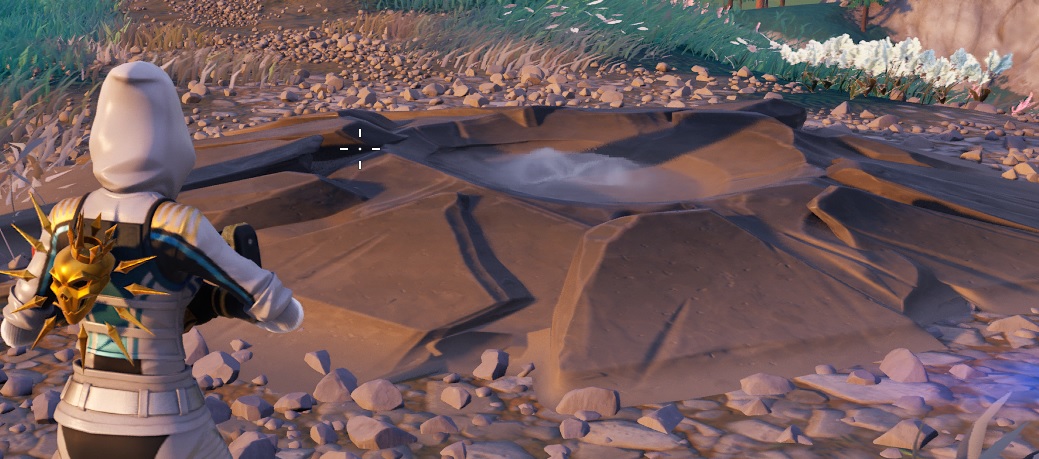
What is a Fortnite Geyser
Geyser in Fortnite are ground bases steam vents that build up pressure then release a column of steam high into the air. There are currently 8 Geysers to use on the south east corner of the island. Drop in and check them out and they are good fun and a great way to make a quick getaway if needed.
They look a bit like a mini creator filled with steam… well, I guess that OK then
Fortnite Geyser – Chapter 4 Season 2
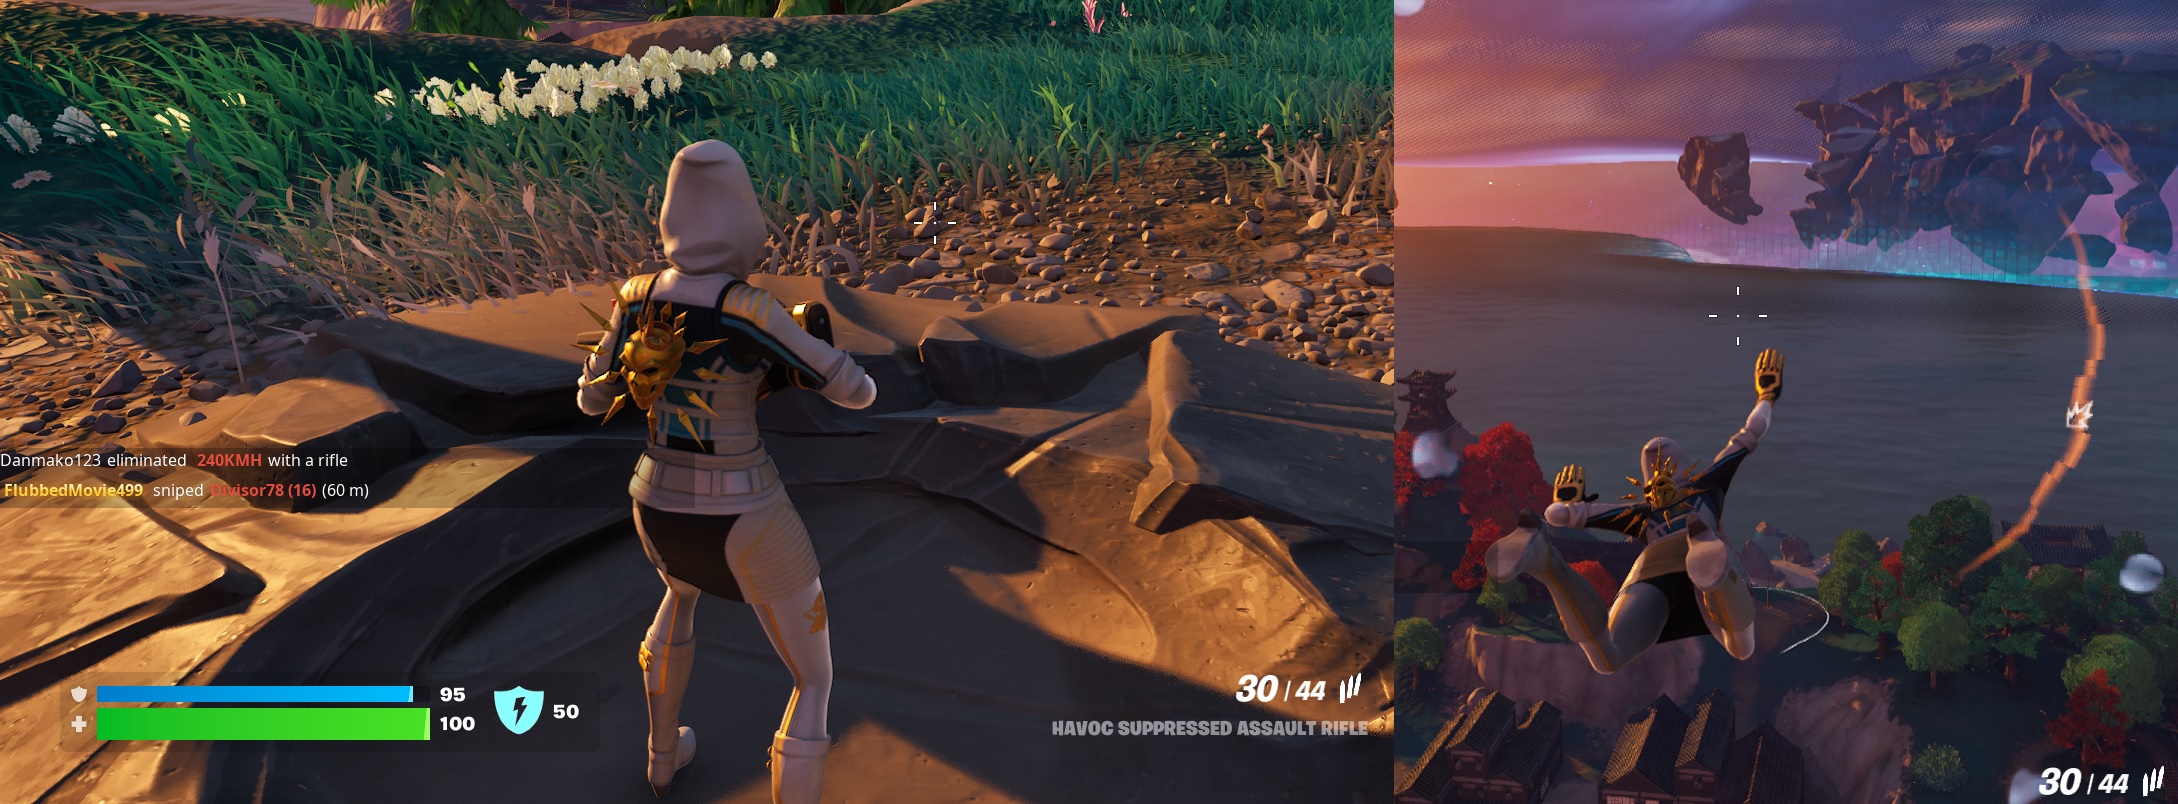
How to use a Fortnite Geyser
Fortnite Geysers are really easy to use and can be a lot of fun to mess about with, just stand in the centre and wait for up to 10 seconds. It will make some odd sounds, gurgle a bit then launch you into the air. This is a great way to travel and paired with Glider Deploy and the Kinetic Blade you can travel a long way.
Fortnite Geyser Locations to Launch into the air – Chapter 4 Season 2
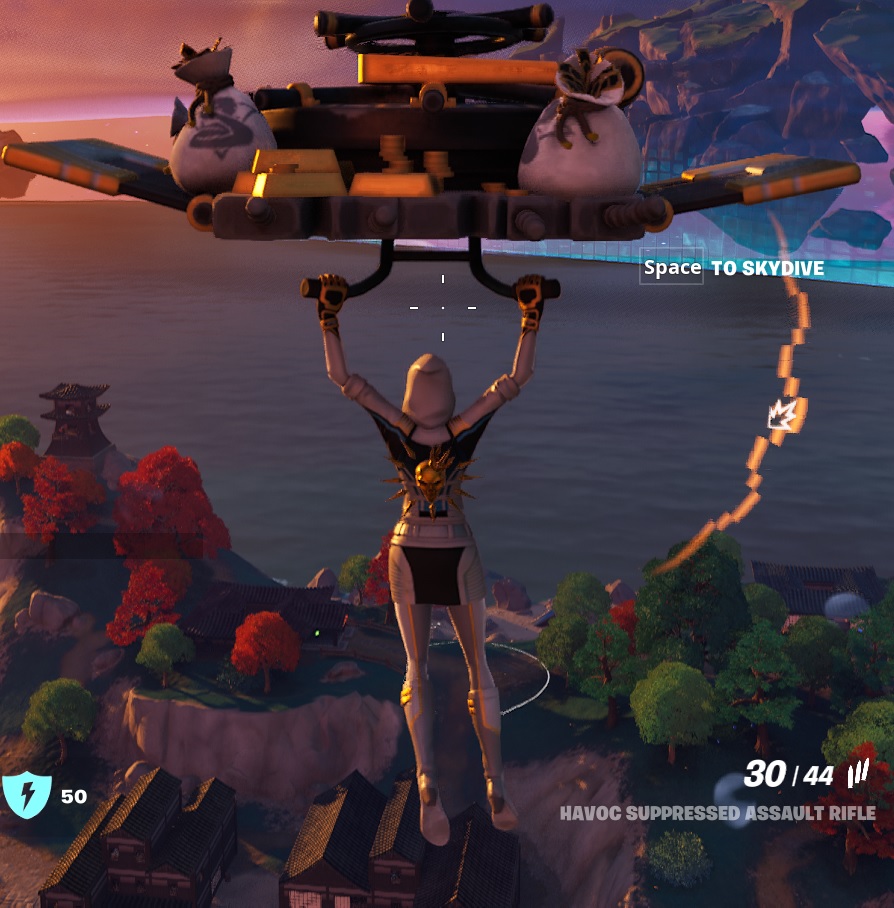
Launch into the air using a Geyser
Can take a few attempts to get the deploy at MAX high, but when you do you can travel a long way. Great for easy fast travel, if timed right, amazing to use when on the run from an appointed.
Fortnite Geyser Locations to Launch into the air – Glider Deploy – Chapter 4 Season 2
Some other Fortnite Guides to help you get Cracked
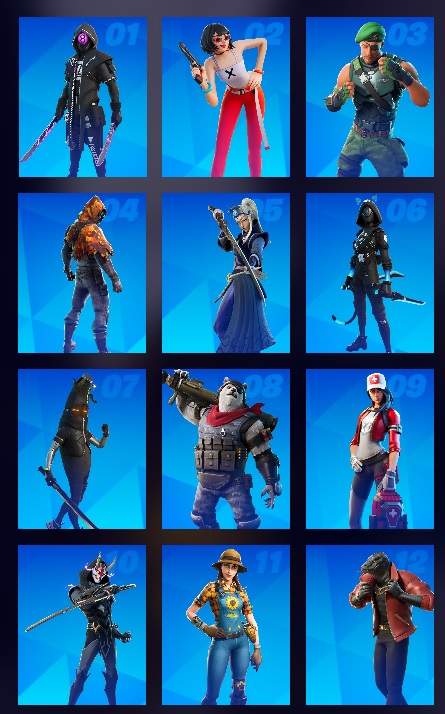
Here are ALL 12 Fortnite Characters Locations or Non-Playable Characters (NPC’s) you will find on the Island. Along with some interesting stats, abilities and items that you might find useful in winning that Crown Victory Royale
We have 12 interactive characters on the Fortnite Island so far, but following the normal Epic format we will see more added as the season progresses up to around 18.
Some of the Fortnite Characters (NPC) can actually be hire as Mercenary types that will help you in your fight, some are better than others, they definitely do act differently.
Fortnite Characters (NPCs) All 12 – Chapter 4 Season 2
What are the Fortnite Characters Locations?
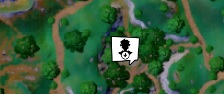
The Fortnite Characters Locations are all over the island, and are usually in plain sight and not too hard to find. They maybe inside a building but are never hidden. They will appear on your mini map radar in the top right as a cartoon speech bubble showing that you can talk to them. Head in the direction of the speech bubble and you should find the NPC you are looking for.
When you are close, a small speech bubble will pop up on the mini-map. Head in the direct of this until you can see the character. You will also see the speech bubble above the character mean you can speak with them.
Character Locations NPC Mini Map
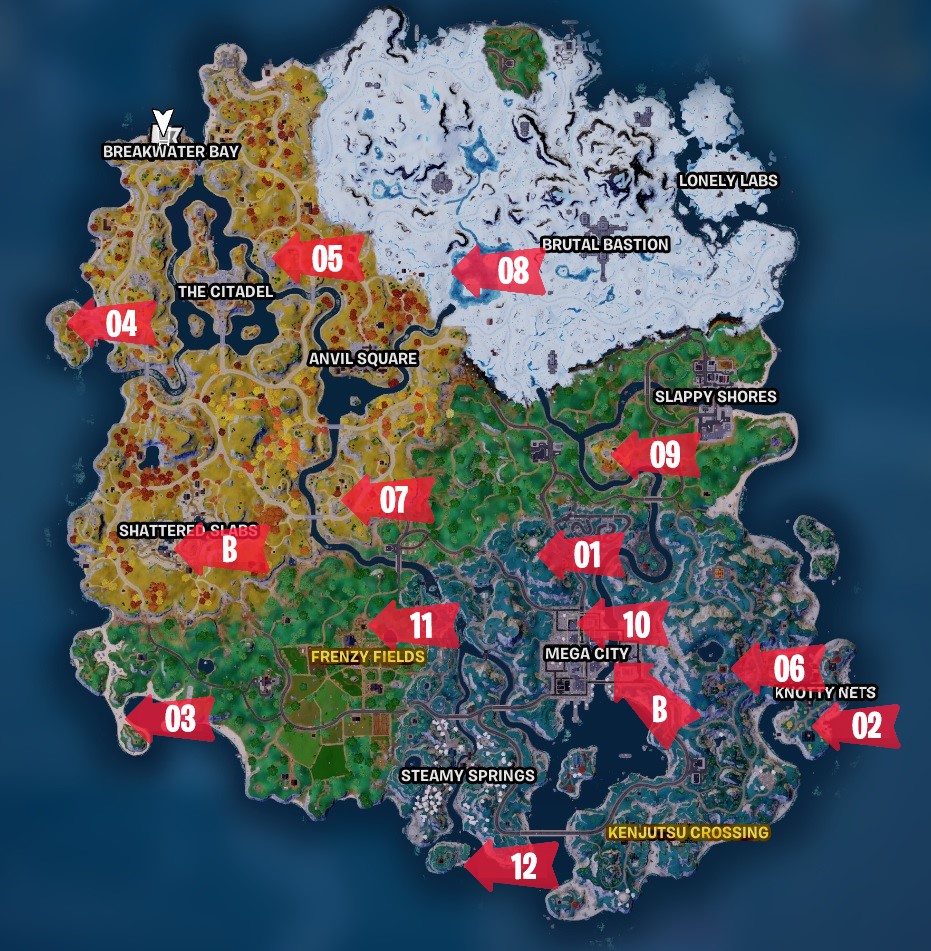
Numbers marked on the map correspond to the character above.
All 12 Fortnite Characters Locations NPC Map – Chapter 4 Season 2
01) CRZ-8 – Centre of the Map at the Bamboo Circle, training areana, 2 Kinetic Blades can be collected here
02) Evie – South end of the small Knotty Nets Island to the West, patrols around the main building
03) Garrison – Patrols around the tower at Watery Watch – South West coast line by the bay
04) Longshot – In the Tower at Royal Ruin, Spawns near the top
05) Mizuki – Eastern Watch Tower, does a patrol of the area
06) NEURALYNX – At Windcatch Lake, East of Mega City. South East building
07) P33LY – At Plesent Passage, does a patrol of the area including the tower
08) Polar Patroller – West Side of Icy Islets frozen lake, Patrols the Outpost
09) Remedy – Secluded Spire, Just North of the race track, in the tower
10) Stray – Mega City, Top of the building, drop here or wait for the action to clear and use the zip cable
11) Sunflower – Same old spot in Frenzy Field
12) Thunder – Lotus Lookout. South Shore, at the beach on the small island.
Not part of the Character Collection but note worthy.
A) Triach Nox – Lonely Labs
B) Highcard – Boss Spawn at Shattered Slabs, Brutal Bastion, Mega City
What do the Fortnite Characters (NPCs) do?
The Fortnite Characters do 1 of 7 things and so if you know what each one does, then you find yourself in their neighbourhood and you need some help, you will know where to go.
Hire – Hire NPC as a mercenary to help you fight
Prop Disguise – Turns you into an item to blend with the surroundings
Rift – Teleports you, rift style, just above their location
Storm Forecast – Shows the next storm phase on your map
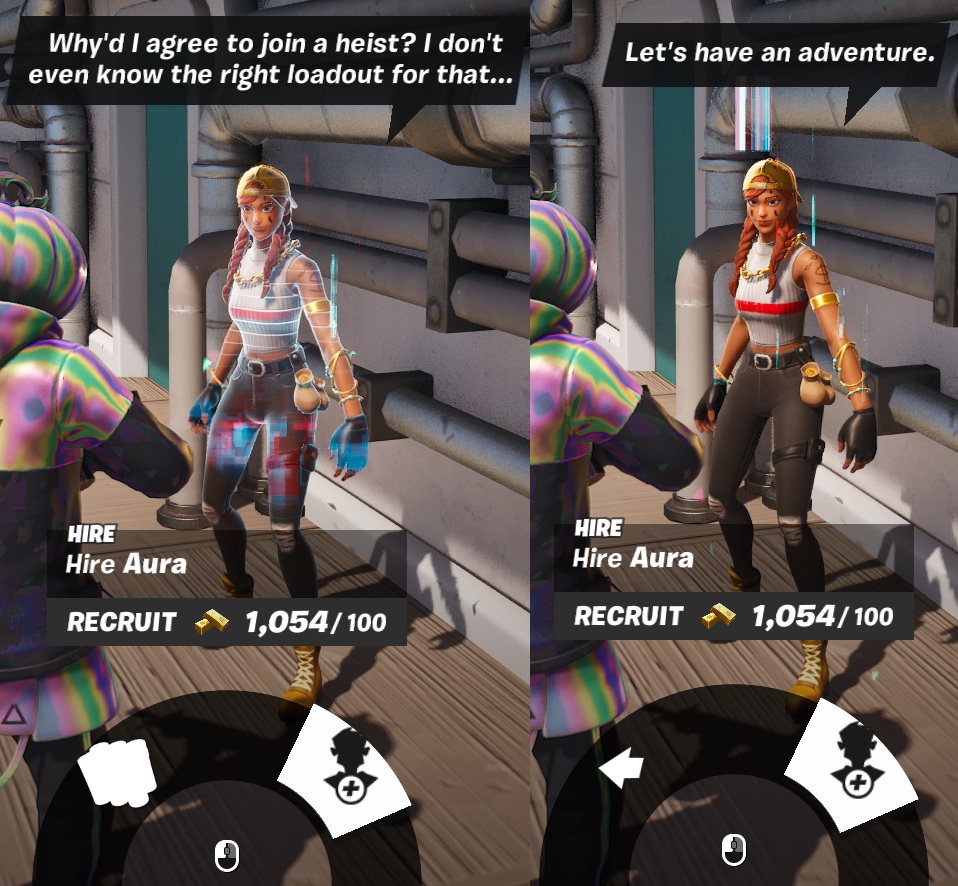
Some of the characters (NPC) in Fortnite are hireable (100 Gold Bars), so you could say they are Mercenaries. Some of them also sell some goods, shield pots, chug splash, bandages, you get the idea. They will also often drop items like bandages and small shield pots when you first talk to them. It’s always worth stopping for a chat.
Walk up to the NPC you wish to hire, engage in chat and look for the hire option from the wheel menu to the bottom of your screen. Select and pay the 100 Gold, well worth it in my opinion and your good to go, you now have a hired mercenary.
Fortnite Characters Locations NPC – Hire
Complete Fortnite Character (NPC) Comparison
Here are all the Fortnite Characters (NPC) with all the features they have on offer for you. Just speaking with some of the characters will give you a free item, so well worth having a chat if your passing
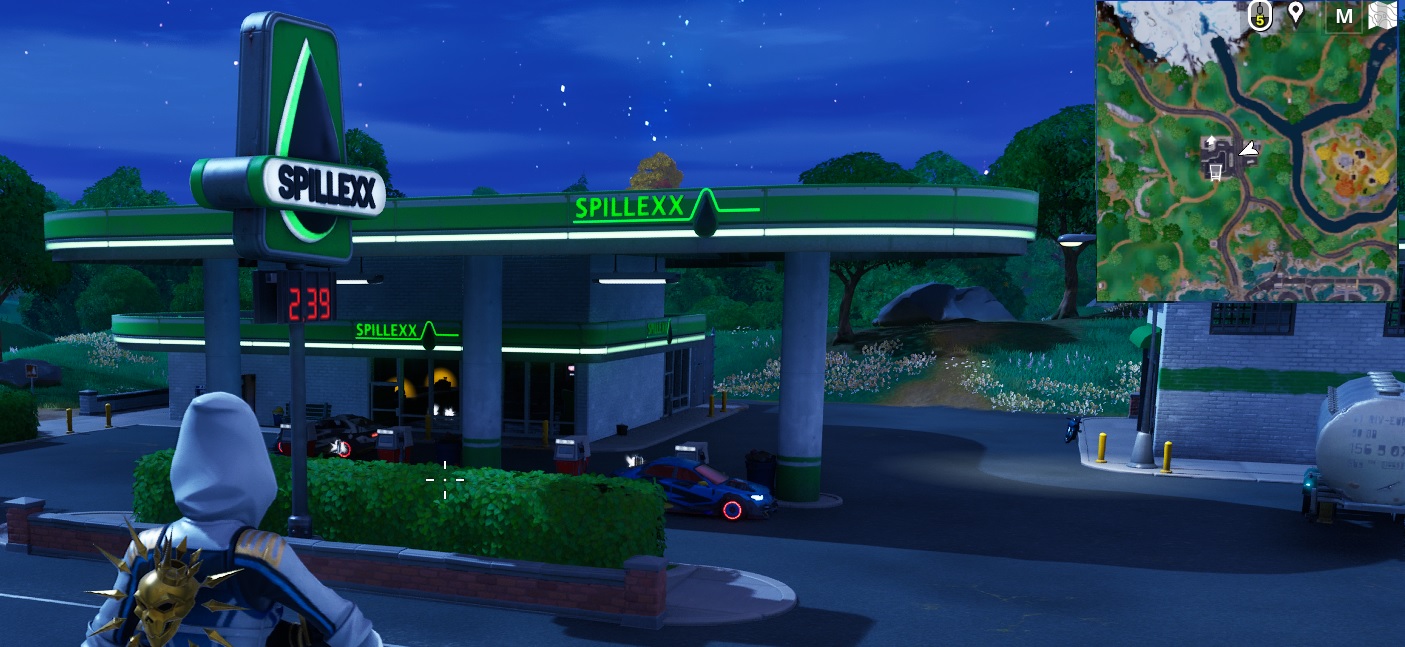
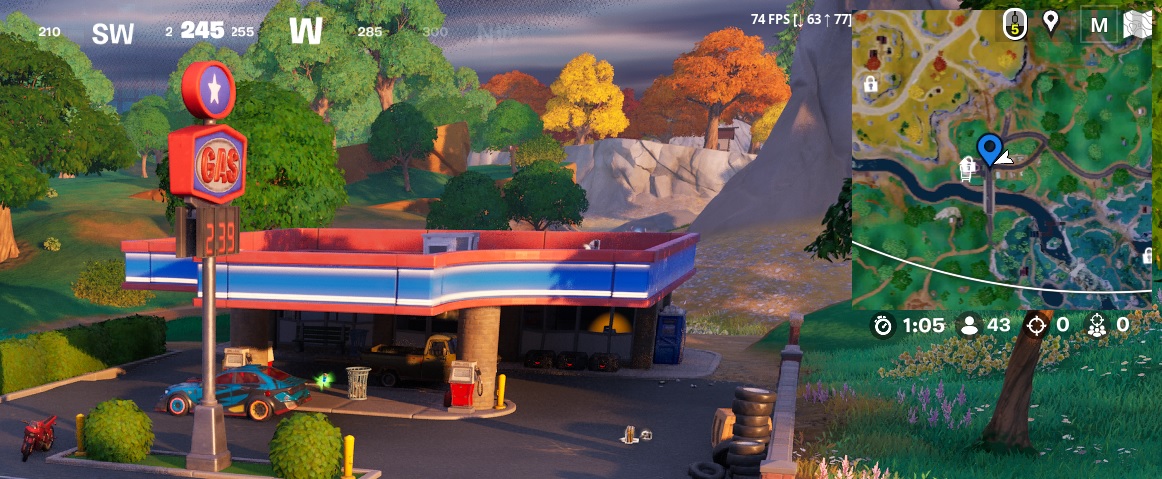
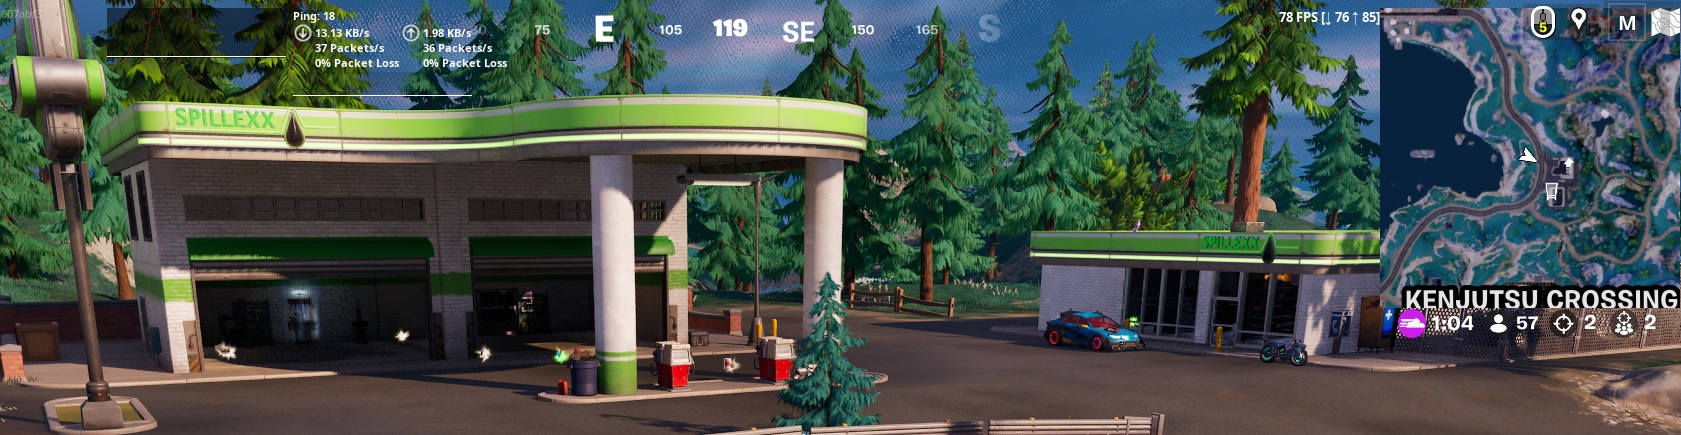
Knowing all 9 Gas Stations and Gas Pumps (Maybe more coming soon) in Fortnite is essential if you are going to utilise vehicles like the Fortnite Nitro Drifter. Without gas you’re not going to get very far in your car, lorry or tank, or even a speedboat for that matter. The Dirt Bike seems to be a bit better on the gas
If your planning on using the Whiplash Fortnite Car or Fortnite Nitro Drifter, then your going to need all the Petrol station locations to hand
Here are all the Gas Stations or Gas Pumps that you can re-fuel your vehicle at on the Fortnite Island. Feel Free to Print it out.
Gas Stations Fortnite Locations Map Chapter 4 Season 2
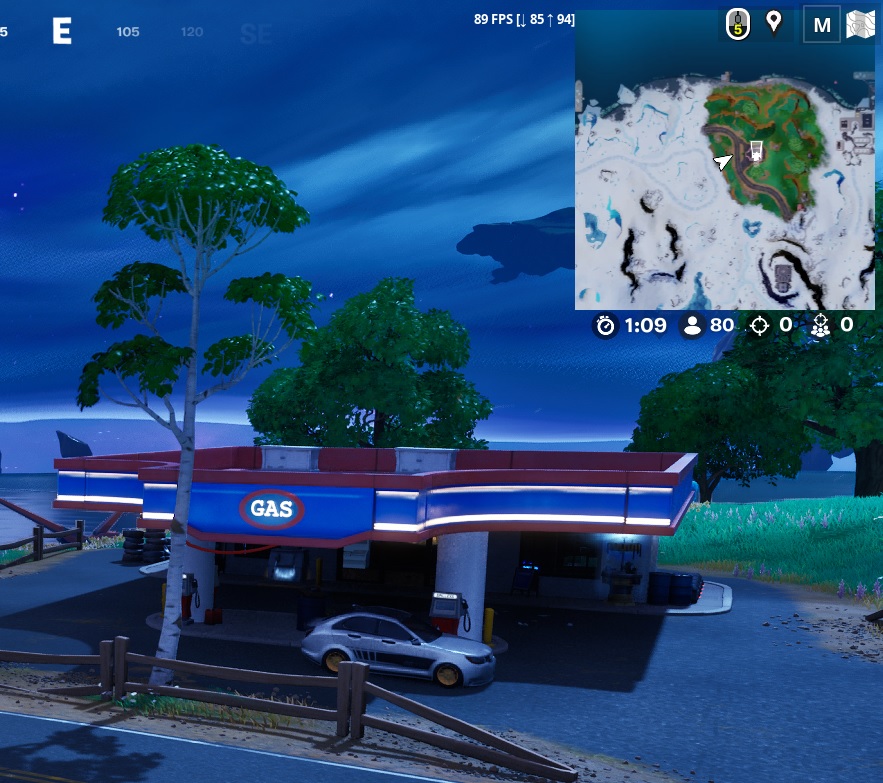
1. Beep N Bounce Gas Station
Northern most Gas Station on the Island, nice setup with 4 pumps, Ice Machine, Big Tires and a shop on offer. Don’t see many people dropping this far north so I would consider a good drop location to start with.
Sometimes has a Fortnite Whiplash parked out front. Depends on the spawn though.
Big Tyres have been removed, all though they are there you can grab them to equip the car, only destroy them.
Pumps
Med Vending machine
Ice Machine
Upgrade Bench
4x Holo-Chests
Beep N Bounce Gas Station Locations Map Chapter 4 Season 2
2. Lonely Labs Pump Station
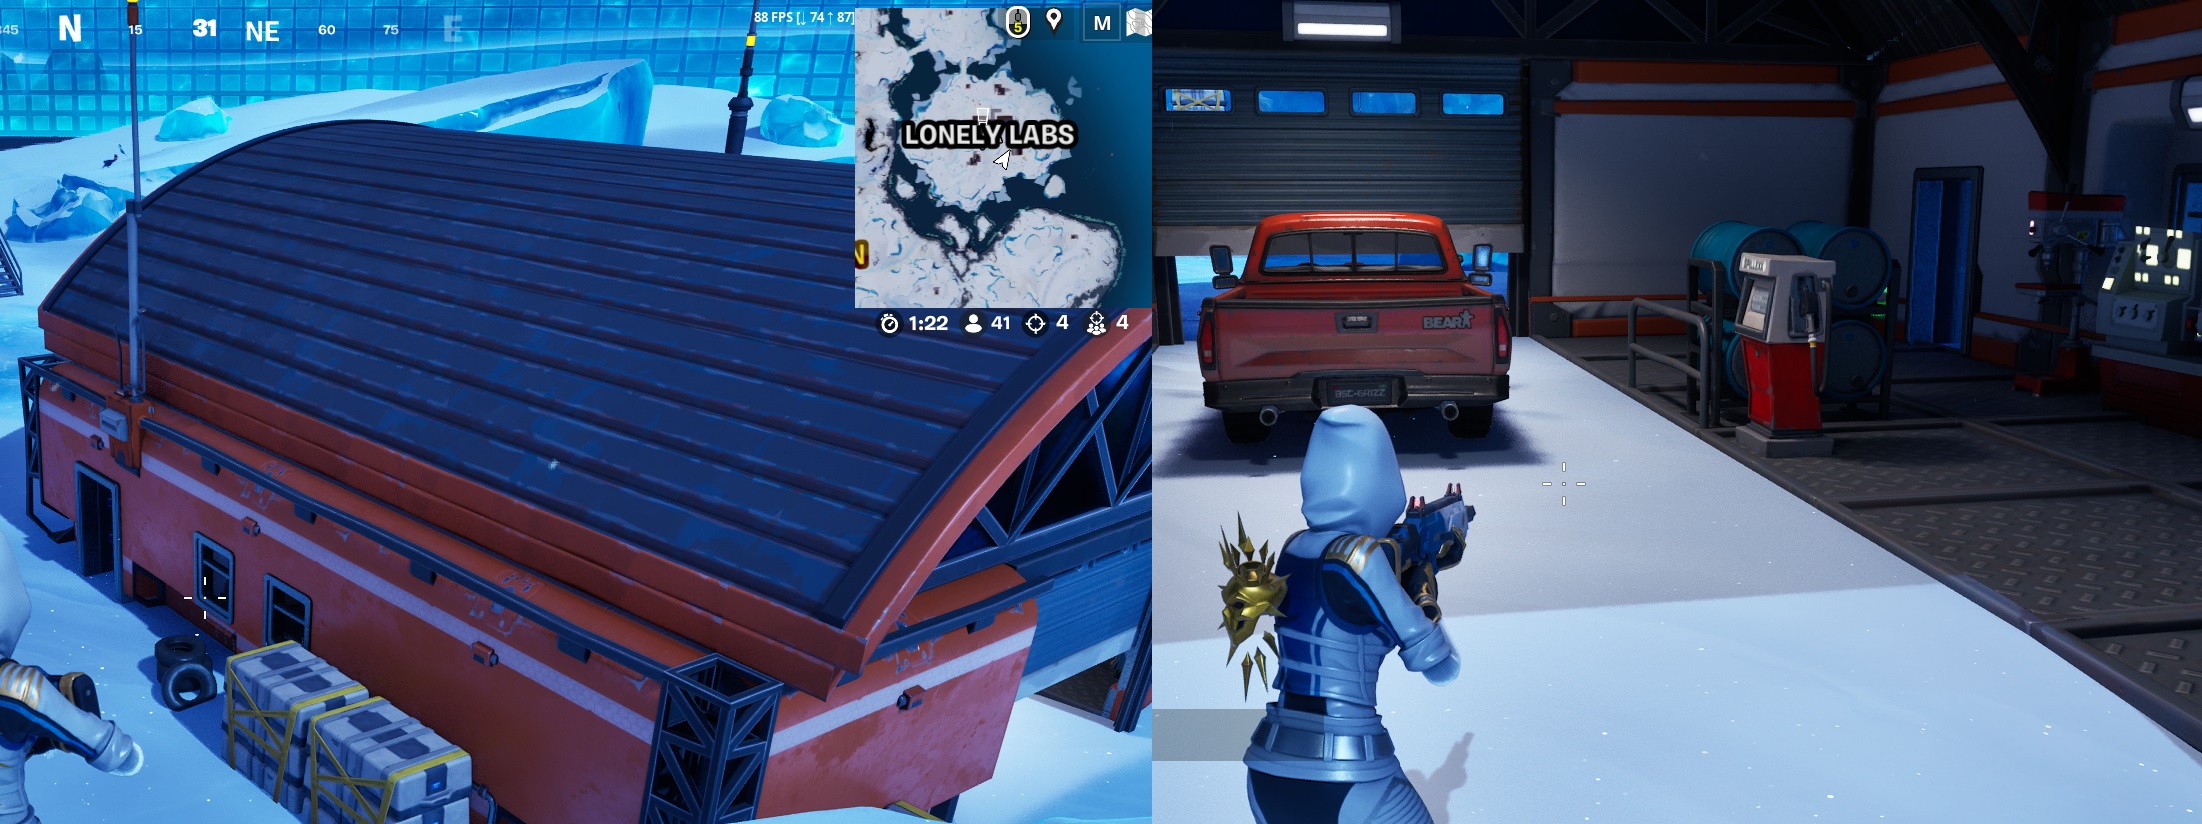
Gas pump at Lonley Labs is actualy inside one of the hangers. Very easy to crash into the pump and draw attention to yourself or blow up the car aswell. Becareful if you have the ability to add big tires and cow catcher while inside the hanger.
I love the detail inside the hanger, with all the tool needed to fix stuff at an outpost, great work from the designers of the map.
Pumps
Ice Machine
Med Vending Machine
Weapon Upgrade Bench
Lonely Labs – Gas Station Locations Map Chapter 4 Season 2
3. Slappy Shores Gas Station
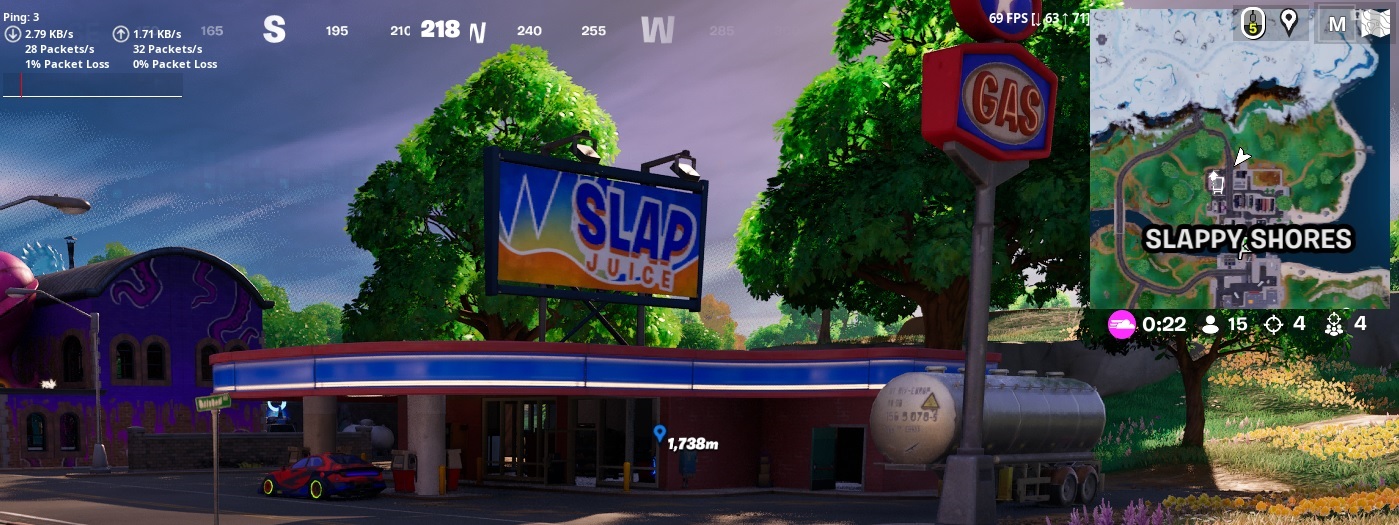
This has always been a bit of a sweaty drop location but seems quite in Chapter 4 Season 2. Also, flag capture location so nice place to drop these days.
Pumps
Med Vending Machine
Upgrade Bench
Slappy Shores – Gas Station Locations Map Chapter 4 Season 2
4. Slap N Go Gas Station
Drop location does see some action due to the location on the map being central. However, not a lot going on here, just the Gas Pumps and normal shop loot, some weapons and ammo.
Blow up gas pump, its crazy and worth doing at least once!
Pumps
Med Vending Machine
Upgrade Bench
Cash Register
4x Holo-Chests
Slap N Go – Gas Station Locations Map Chapter 4 Season 2
5. Hitches and Ditches Gas Station
Located opposite a trailer sales yard, hence the name. Nice spot and also has some Gas Cans as well as the pumps. Usual, layout of items in the store but no cash register
Pumps
Ice Machine
Med Vending Machine
Upgrade Bench
Cash Register
3x Holo-Chests
Hitches and Ditches Gas Station Locations Map Chapter 4 Season 2
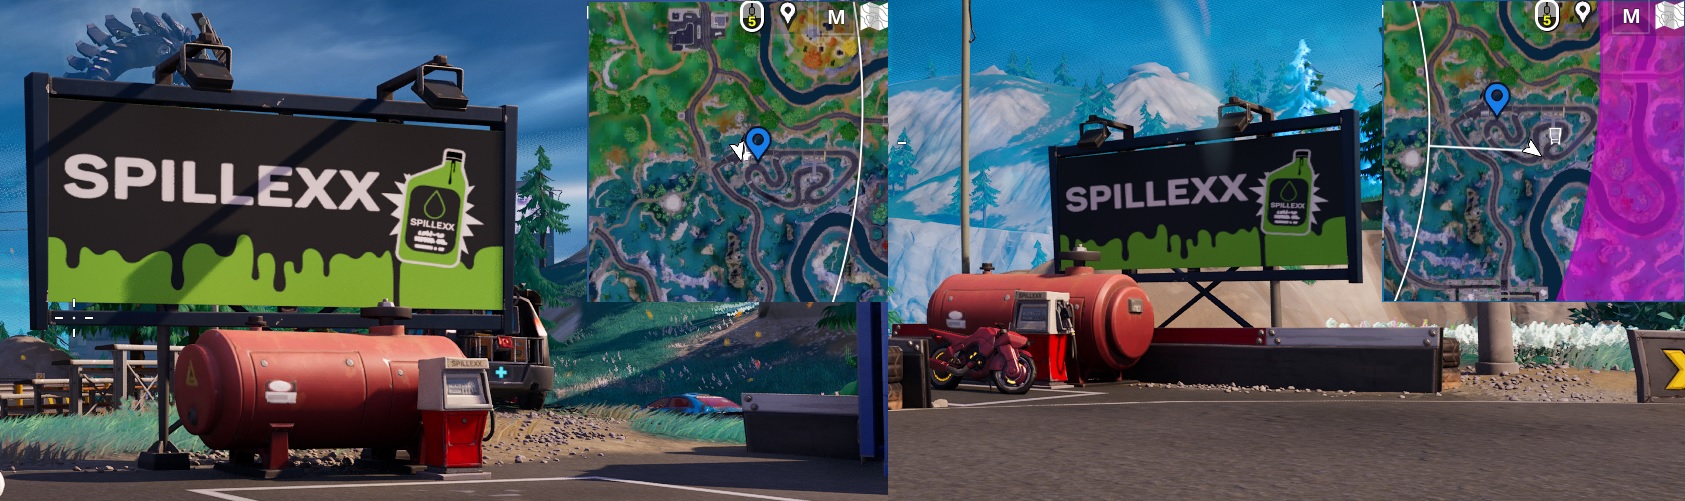
6. Drift Ridge Gas Pumps
2 Pumps at the Drift Ridge race track. They have large tanks next to the pump so watch out as they make great camp fire! Som good loot here but you need to hunt about.
Pumps
Med Vending Machine
Upgrade Bench
Cash Register
4x Holo-Chests
Drift Ridge – Gas Pump Locations Map Chapter 4 Season 2
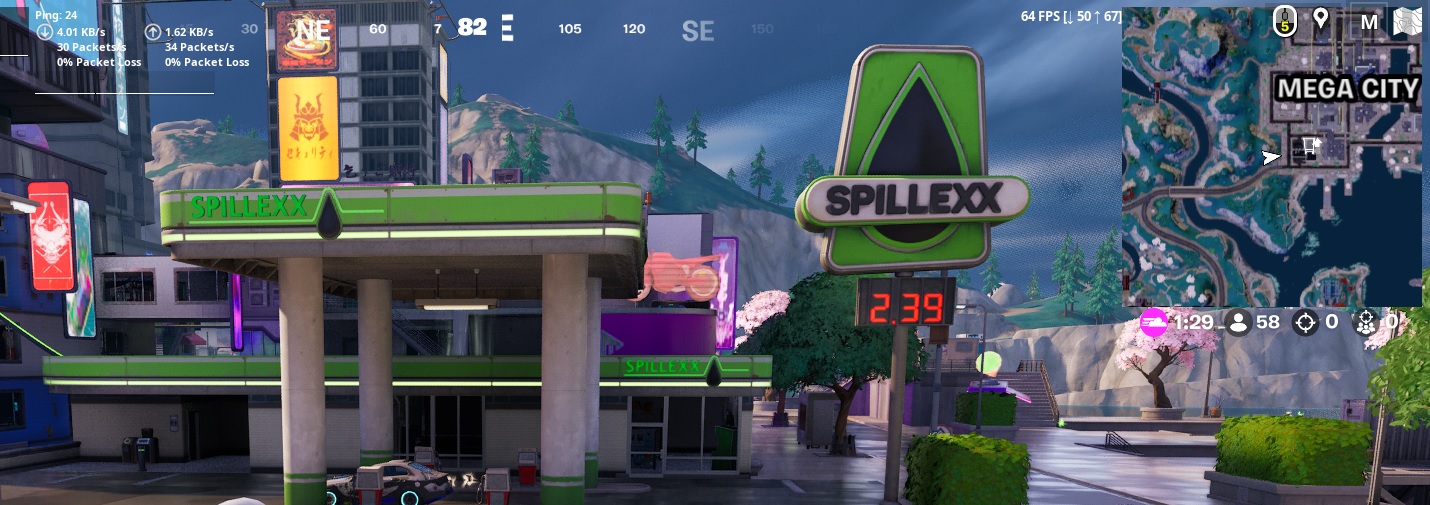
7. Mega City Gas Station
Sweat central drop location, especialy in the first few weeks of the season. Hopfully will calm down after a while. Lots going on here, rails to ride, loot to be had!
Pumps
Med Vending Machine
Upgrade Bench
Cash Register
Mega City – Gas Station Locations Map Chapter 4 Season 2
8. Knotty Nets Gas Pumps
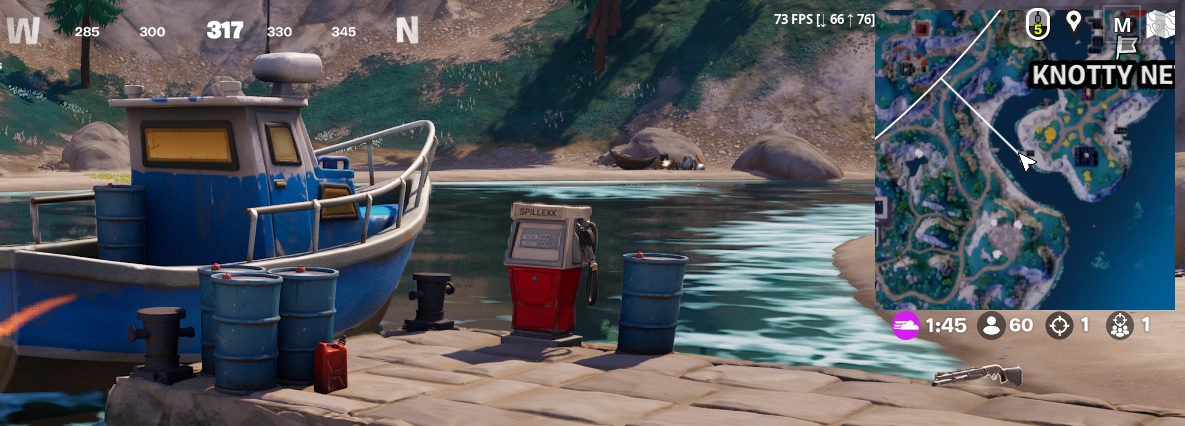
More like and small boating jetty with a Gas Pump, few bits of loot that could be of use
Pumps
3x Holo-Chests
Knotty Nets – Gas Pump Locations Map Chapter 4 Season 2
9. Fallow Fuel gas Stations
I actually really like this as a drop location, lots of loot, always a few opponents to eliminate but not too many. Good utility items and vehicles
Dumpster
Pumps
Med Vending machine
Upgrade Bench
4x Holo-Chests
Fallow Fuel – Gas Station Locations Map Chapter 4 Season 2
Here is the Fortnite Map Locations for Chapter 4 Season 2. This is a great start to the new season and the addition of the MEGA City is Amazing! The neon theme and new Fortnite Rogue Bike just reminds me of one of my all time favorite films, Akira!
I expected new land to be added but we have a new MegaCity, did i mention its amazing?
Looks like some new locations in Chapter 4 Season 2 and they are amazing.
Mega City
Steamy Spring
Knotty Nets
Kenjutsu Crossing
Being familiar with the Fortnite Map Locations is almost an essential part of playing Fortnite. It could mean the difference between an elimination or escaping with 5HP to your name, healing up then fighting again.
The Fortnite map is forever evolving and changing, with new areas popping up all the time. I think we are going to have some OG POI being pulled onto the island for you to Battle in.
I will try and cover as many of the “need to know” areas as I can that will help you with either Fortnite Quests or general game play like knowing the Gas Stations and Pump locations.
Fortnite Maps of Locations
Some of the locations you will need to know to complete quests but others are just really good to know for general play tactics and help get those crowns. The Fortnite map is forever changing with every update. On the launch date of each update, we get to see the new area will be in “grey” to indicate we have not travelled there. Traveling to a new area will grant you some XP.
Area
Info
Mega City
Amazing job on this Neo-Tokyo Style city from Akira
Steamy Spring
Knotty Nets
NetsKenjutsu Crossing
Fortnite Map Locations for Quests
There are 1000s of Quests in Fortnite to complete, with most of the requiring you to visit a location and perform a task or action. These could be as simple as walking over a beacon on the ground or to collect 5 items in a single match or performing 3 actions.
Here are some of the most common locations used by quests:
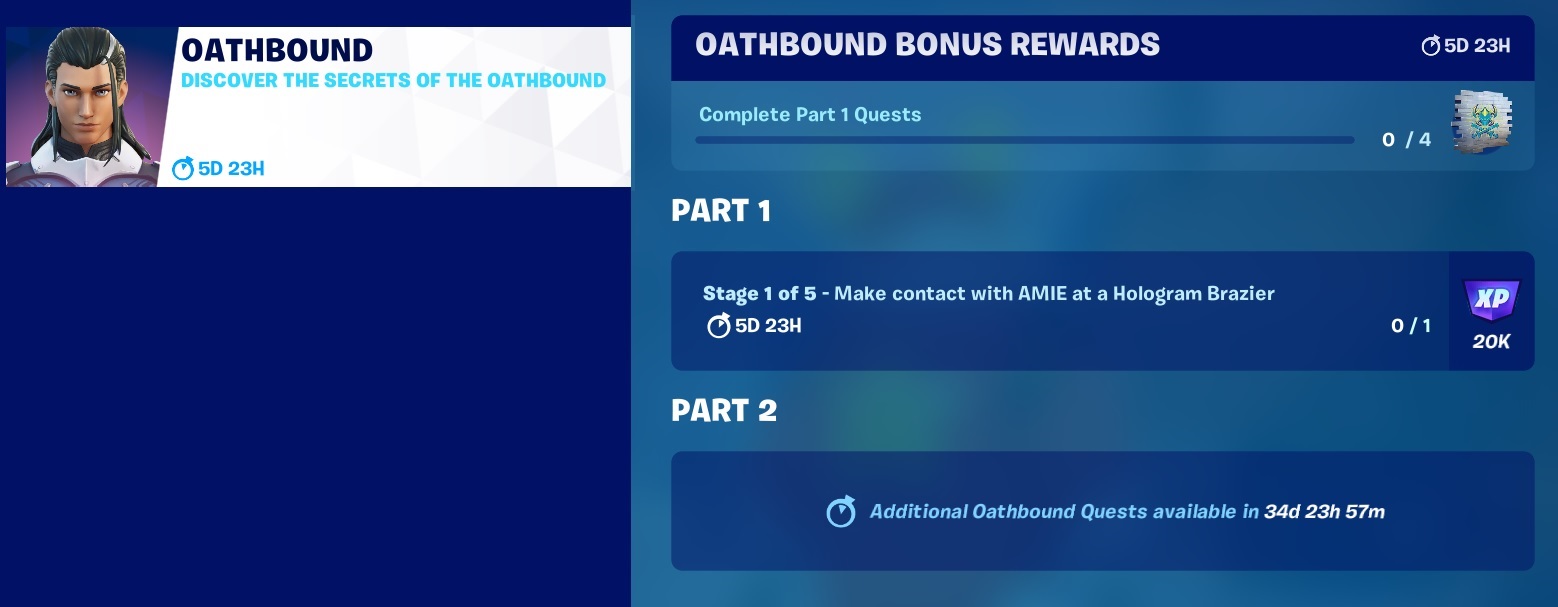
We kick off this great new season with, Fortnite Oathbound Bonus Rewards. By the looks of things this is going to be a very long quest line, hopefully with some Free Fortnite items to be collected along the way.
You can see that it’s at least a 4 Part quest line with 5 stages in part 1, covering over 35 Days! You will receive the first reward, a spray emote after completing 4 stages, let’s hope this is just a warm up for some good items.
The XP for some of these stages looks pretty good as well at 20K a pop for some simple tasks around the island.
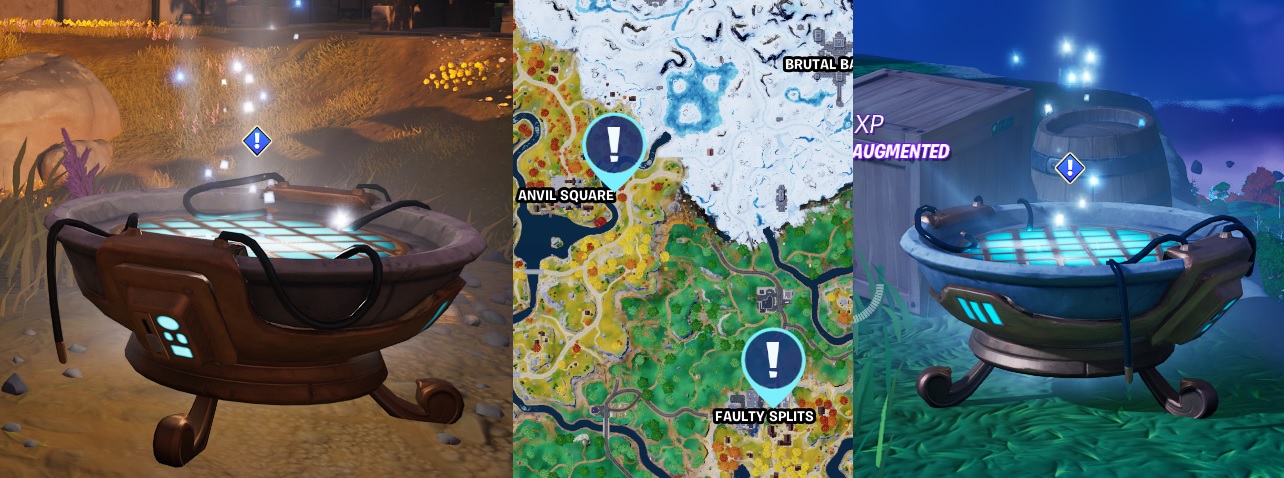
Oathbound Bonus Rewards – Part 1 – Stage 1 of 5 – Make Contact with AMIE at a Hologram Brazier
Fortnite – Oathbound Bonus Rewards Part 1 – Stage 1 of 5 – Make Contact with AMIE at a Hologram Brazier
The Oathbound rewards are received after completing 4 Parts within the major PART 1 Quest line, broken down into sub quests that there are 5.
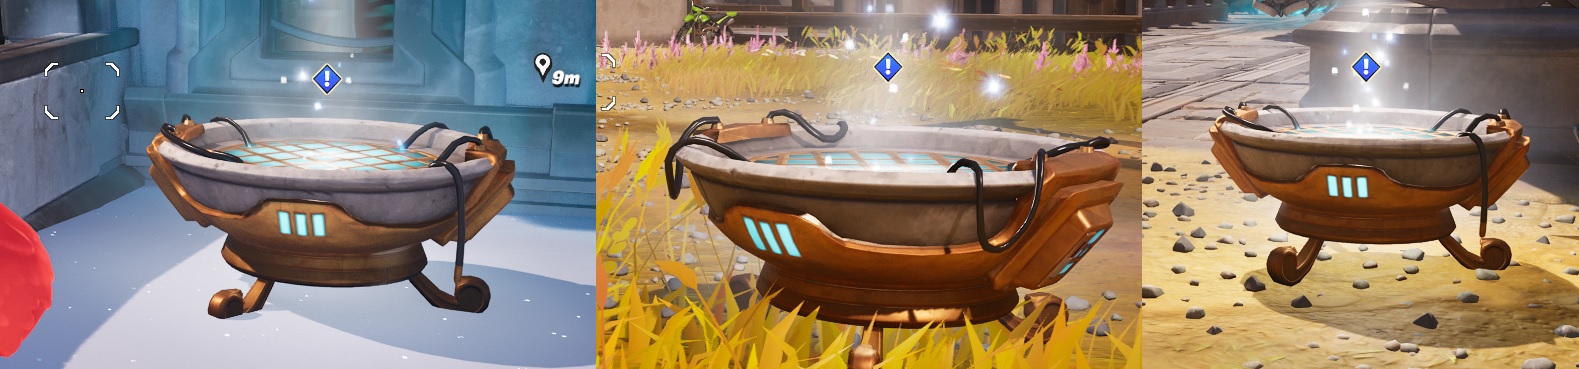
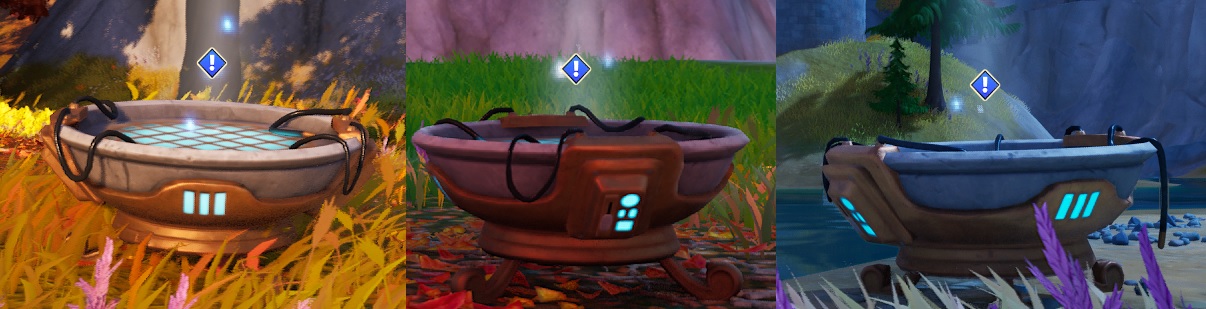
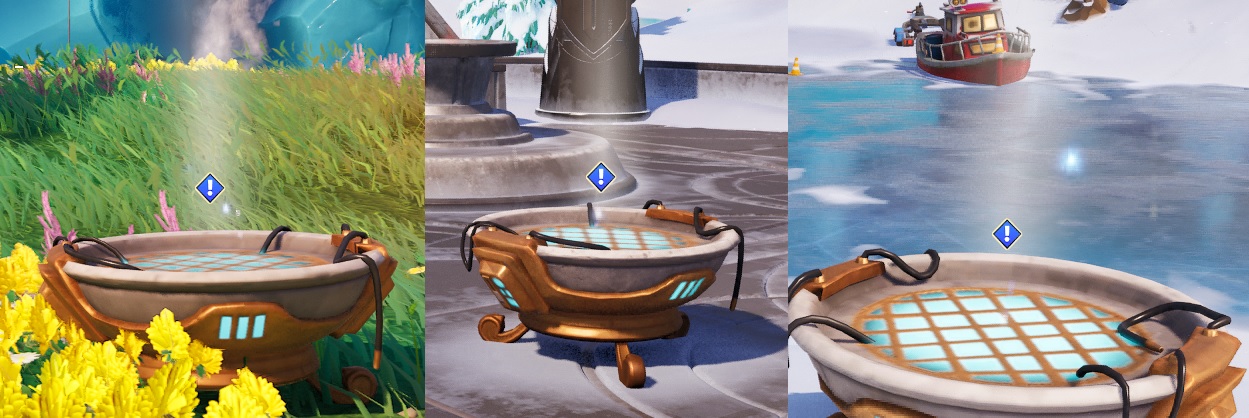
Stage 1, use the “track quest” option in the quest menu and check the map for the locations of the Hologram Brazier. You only need to go to one of these locations and interact with the Hologram Brazier
Fortnite – Oathbound Quests – Part 1 – Stage 1 of 5 – Hologram BrazierGet your very own, Cracked at Fortnite T-Shirts
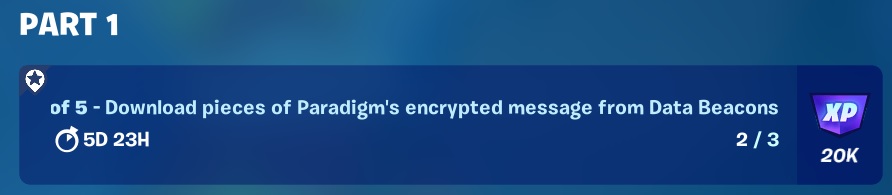
Oathbound Bonus Rewards – Part 1 – Stage 2 of 5 – Download Pieces of Paradigm’s encypted message from Data Beacons
Oathbound Bonus Rewards Part 1 – Stage 2 of 5 – Download Pieces of Paradigm’s encrypted message from Data Beacons
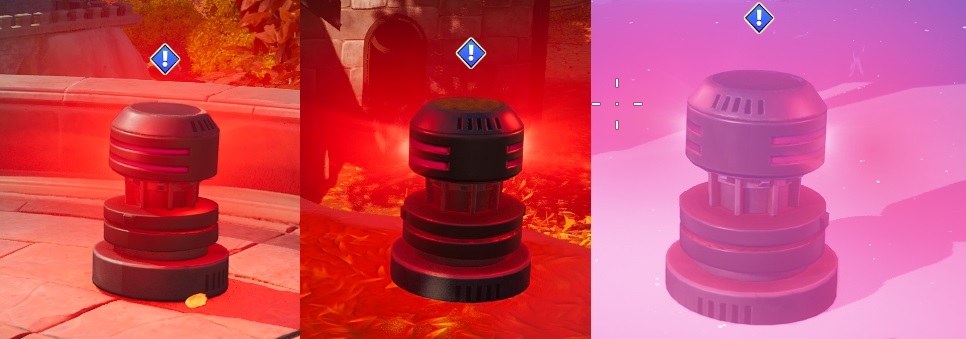
Stage 2, you’re going to need to collect the encrypted messages from 3 Data Beacons. Track Quest and check the map again for drop locations as you have 6 you can use. Pick your favourite map location and head out. You should be able to collect all 3 in a single match, they look like these.
Fortnite – Oathbound Quests – Part 1 – Stage 2 of 5 – Data Beacons
Oathbound Bonus Rewards – Part 1 – Stage 3 of 5 – Decode Paradigm’s message at one of the Terminals
You should be able to complete part 3 and part 4 in the same match as they are pretty close. Read ahead so you know what to expect, you maybe able to complete stage 5 if you are quick
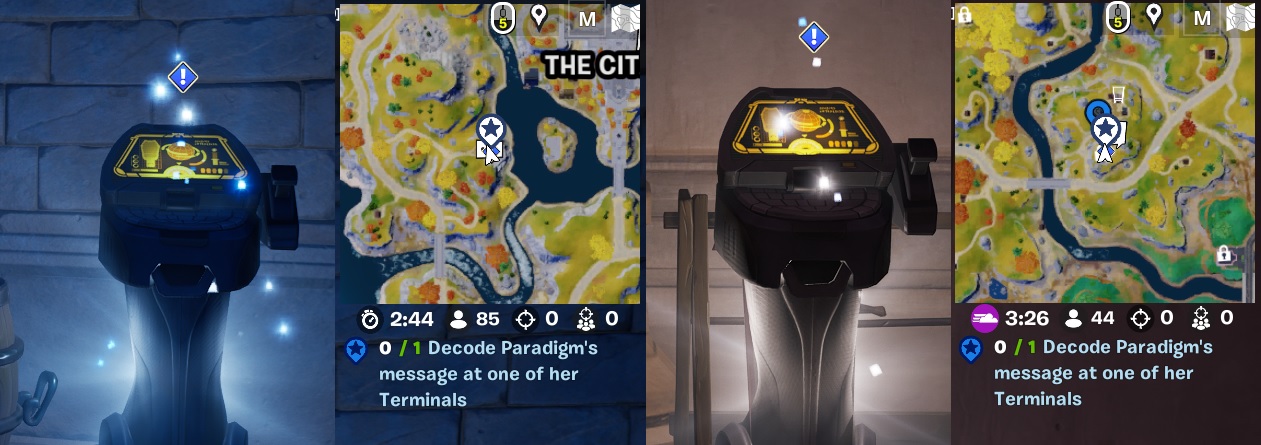
Oathbound Bonus Rewards Part 1 – Stage 3 of 5 – Decode Paradigm’s message at one of the Terminals
You have a selection of 3 places to decode the message.
West of The Citadel in the basement of the Tower
1st Floor of the Tower at Plesent Passage
???
Fortnite – Oathbound Quests – Decode Paradigm’s message at one of the Terminals
Oathbound Bonus Rewards – Part 1 – Stage 4 of 5 – Retrieve a box of Refined Materials
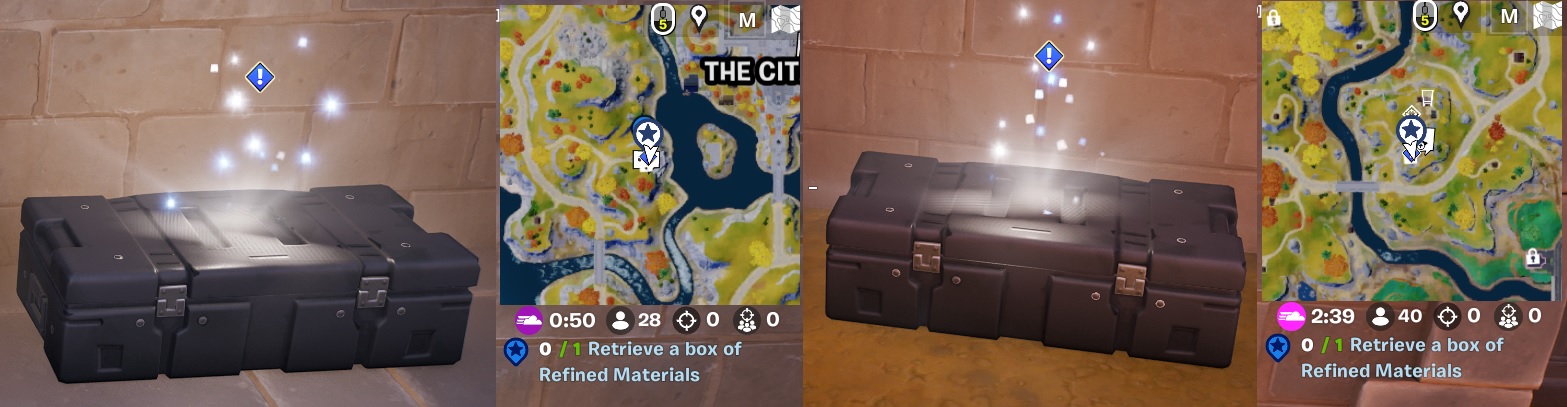
Oathbound Bonus Rewards – Part 1 – Stage 4 of 5 – Retrieve a box of Refined Materials
The box you are looking for is directly outside the tower you have just found the console in, quick dash outside and BOOM, next one completed
Fortnite – Oathbound Quests – Retrieve a box of Refined Materials
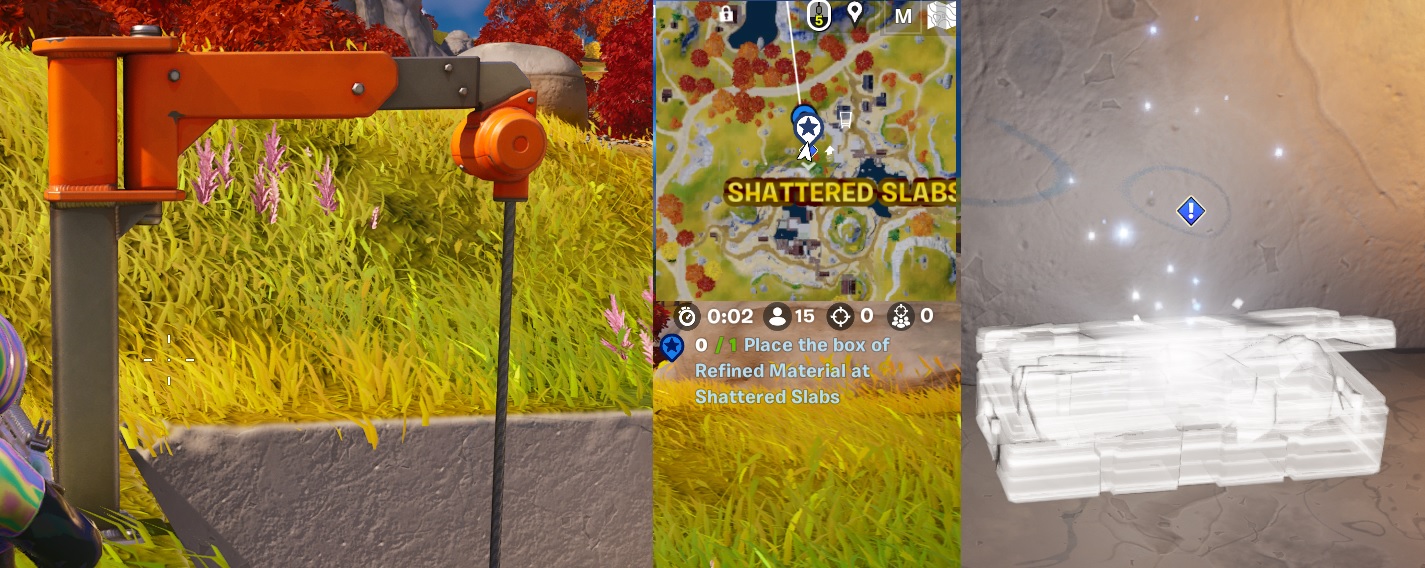
Oathbound Bonus Rewards – Part 1 – Stage 5 of 5 – Place the box of Refined Materials at Shattered Slabs
Oathbound Bonus Rewards – Part 1 – Stage 5 of 5 – Place the box of Refined Materials at Shattered Slabs
This one takes you on a journey to Shattered Slabs to an area if it was not for this quest, I would have never visited. Another reason to do the quests! Use the Zip line to drop down into the dig site, drop off the mats to the location.
Fortnite – Oathbound – Place the box of Refined Materials at Shattered Slabs
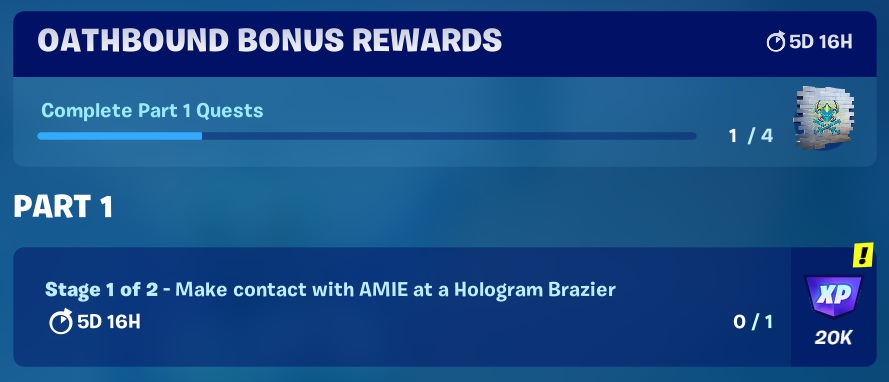
Oathbound Bonus Rewards – Complete Part 1 Quests – 1/4
The Quest naming gets a bit odd here as we are still on Part one, but completed the 1/4 of Part one so is now Stage 1 of 2. Most odd, should this not be part 2?
Oathbound Bonus Rewards – Complete Part 1 Quests – 1/4
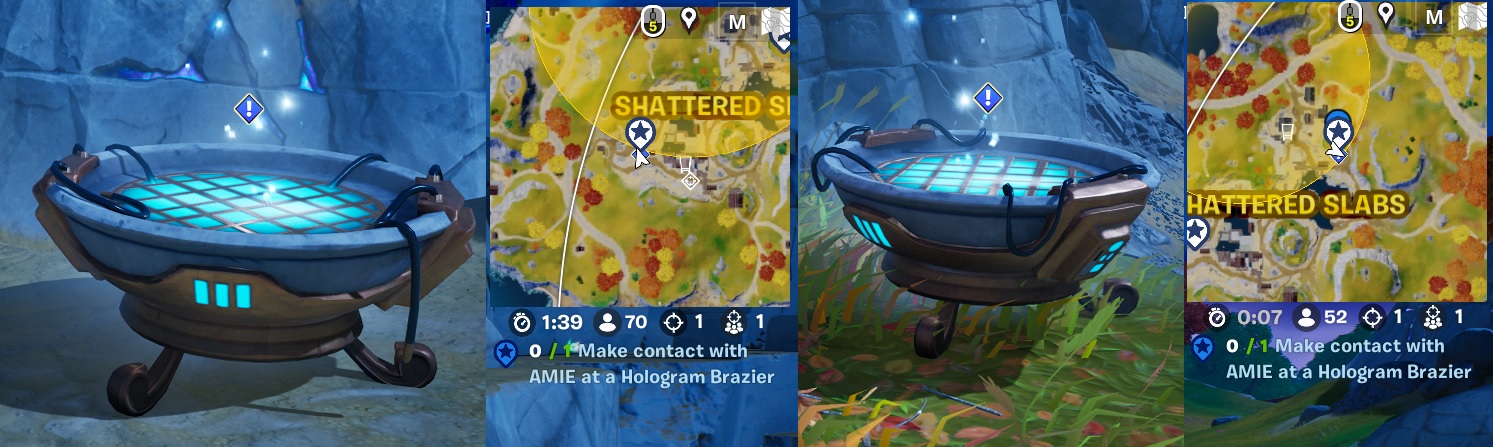
Oathbound Bonus Rewards – Part 1.1 – Stage 1 of 2 – Make Contact with AMIE at a Hologram Brazier
Oathbound Bonus Rewards – Part 1.1 – Stage 1 of 2 – Make Contact with AMIE at a Hologram Brazier
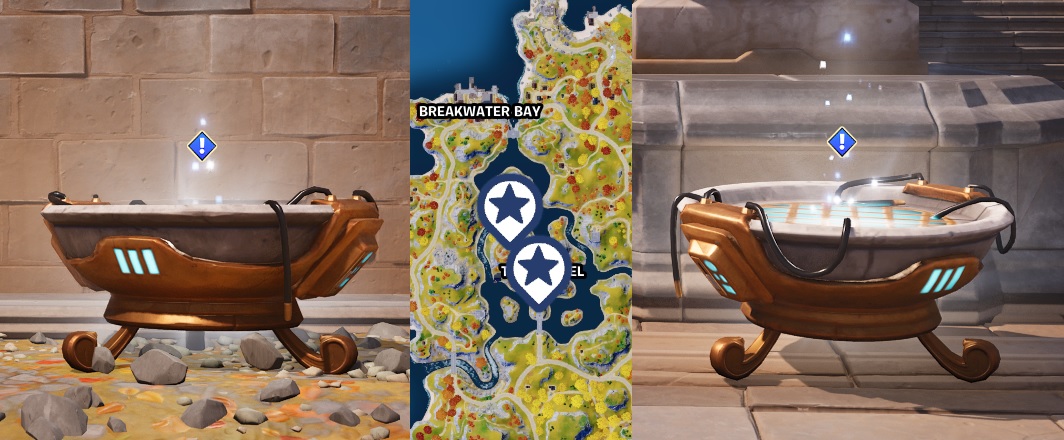
You are going to need to find those Hologram Brazier’s again, the cauldron looking search lights! 2 On the island at Shattered Slabs.
Fortnite – Oathbound Quests – Make Contact with AMIE at a Hologram Brazier
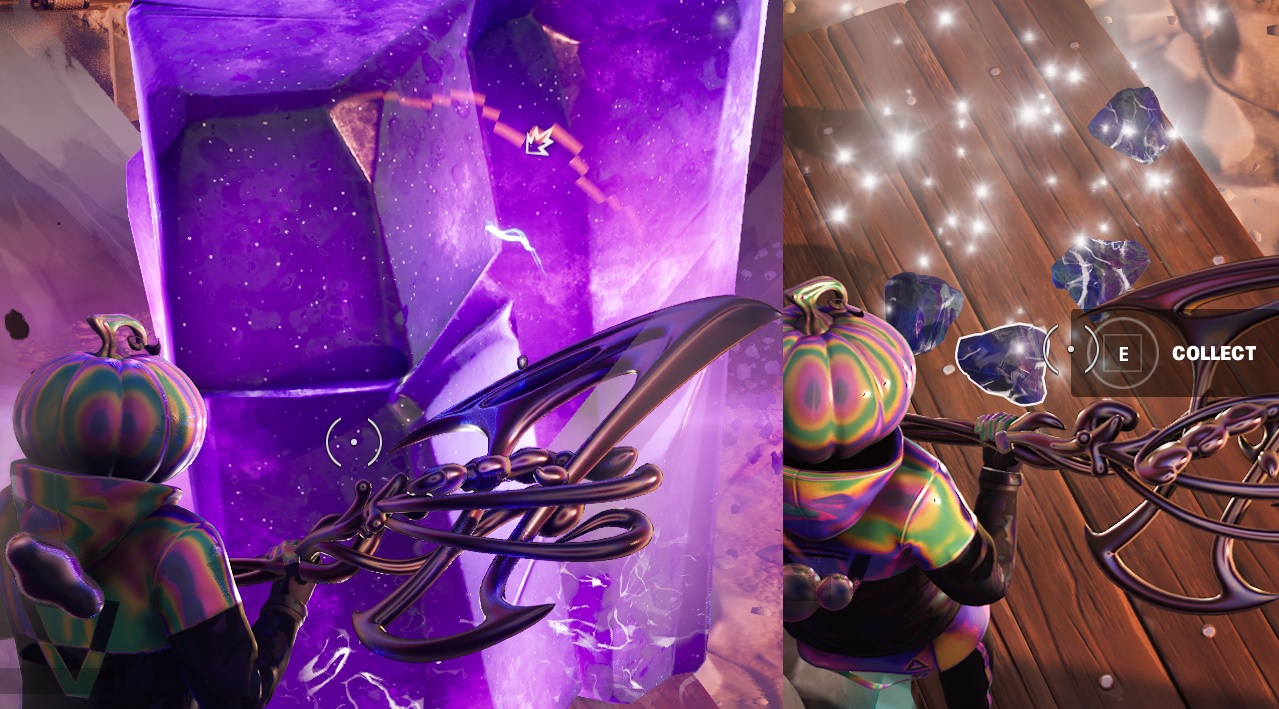
Oathbound Bonus Rewards – Part 1.1 – Stage 2 of 2 – Hit Kinetic Ore with your harvesting tool to collect dropped Kinetic Chunks
Oathbound Bonus Rewards – Part 1.1 – Stage 2 of 2 – Hit Kinetic Ore with your harvesting tool to collect dropped Kinetic Chunks
At the Shattered Slabs mine, look for the large purple/pink monoliths (Big Huge Rocks) and smash one of them with your harvesting tool to get some small rocks that you can collect.
Fortnite – Oathbound Quests – Hit Kinetic Ore with your harvesting tool to collect dropped Kinetic Chunks
Oathbound Bonus Rewards – Part 1.2 – Stage 1 of 4 – Make Contact with AMIE at a Hologram Brazier
Oathbound Bonus Rewards – Part 1.2 – Stage 1 of 4 – Make Contact with AMIE at a Hologram Brazier
Another Hologram thingy to visit and activate to receive another message for instructions
Fortnite – Oathbound – Make Contact with AMIE at a Hologram Brazier
Oathbound Bonus Rewards – Part 1.2 – Stage 2 of 4 – Collect a Shockwave Hammer
Oathbound Bonus Rewards – Part 1.2 – Stage 2 of 4 – Collect a Shockwave Hammer
Hammers can be found all over the island, but a good place to start looking is in the Oathbound Chests, these have a good change to contain one.
Pic of chest and hammer
Oathbound Bonus Rewards – Part 1.2 – Stage 3 of 4 – Travel 150 meters by bouncing with a Shockwave Hammer
Oathbound Bonus Rewards – Part 1.2 – Stage 3 of 4 – Travel 150 meters by bouncing with a Shockwave Hammer
Should be easy enough, combinations of both Fire and aim “Fortnite Keybinds” will perform different actions, get the combo right and you can go for a bounce.
Oathbound Bonus Rewards – Part 1.2 – Stage 4 of 4 – Damage opponents with the Shockwave Hammer
Oathbound Bonus Rewards – Part 1.2 – Stage 4 of 4 – Damage opponents with the Shockwave Hammer
Grab that Shockwave Hammer and go bounce, then end in an earth slam to do damage to close structures and for this quest opponents!
Oathbound Bonus Rewards – Part 1.3 – Stage 1 of 2 – Make Contact with AMIE at a Hologram Brazier
Oathbound Bonus Rewards – Part 1.3 – Stage 1 of 2 – Make Contact with AMIE at a Hologram Brazier
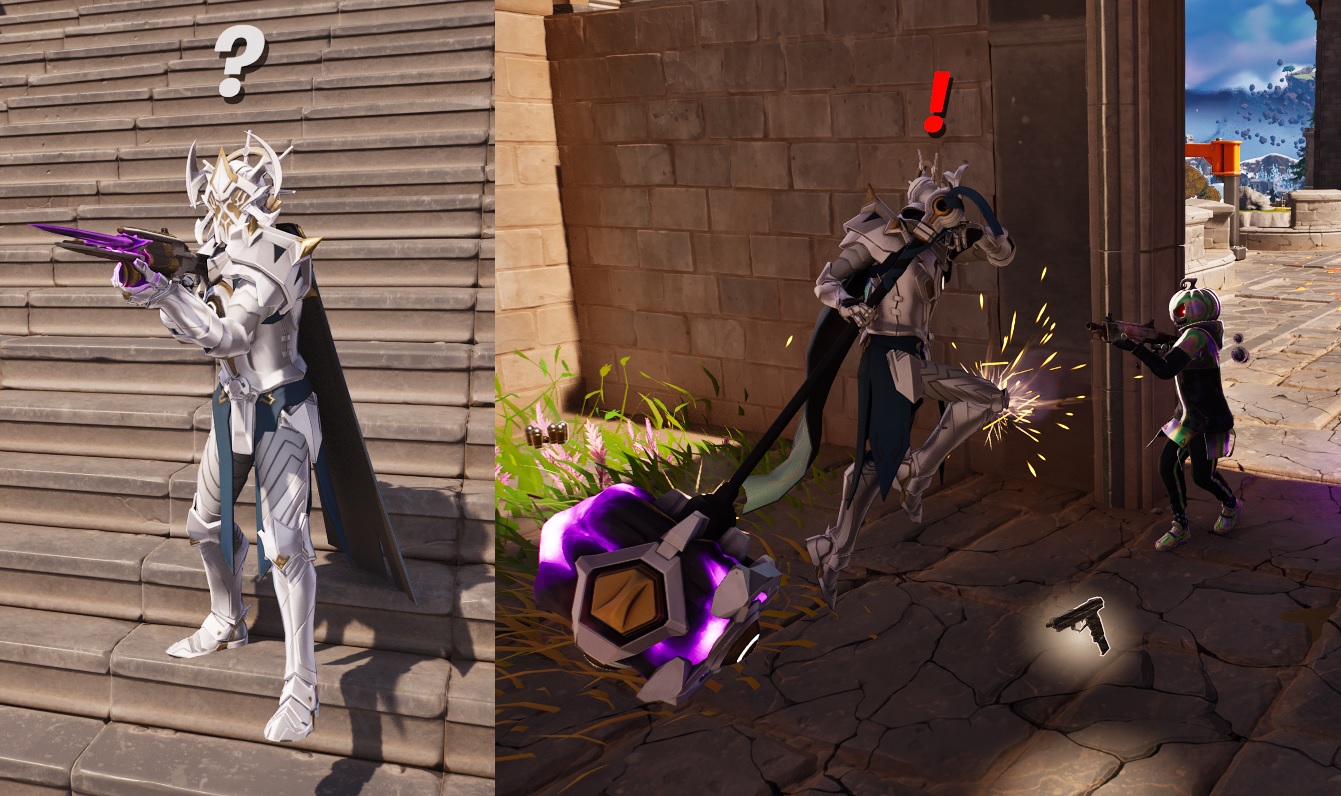
Another contact quest, listen to the message but be ready for a fight, the boss is going to attack you. Make sure you have good health, shields and weapons/ammo for this, especially if you are solo. I wasn’t expecting this so was not really tooled up, but I still defeated him, he’s not that Ageless anymore…
Fortnite – Oathbound – Make Contact with AMIE at a Hologram Brazier
Oathbound Bonus Rewards – Part 1.3 – Stage 2 of 2 – Assist in defeating The Ageless Champion
Oathbound Bonus Rewards – Part 1.3 – Stage 2 of 2 – Assist in defeating The Ageless Champion
There wasnt much assisting going on here, you should be able to solo The Ageless Champion if you have the right tools
Tips to solo The Ageless Champion
Make sure your ready to fight, full health, shields, weapons and ammo
When the Champion gets the Hammer out ready to strike, make sure you have your back against a wall to minimise the knock back.
Jump in the air when he Hammer strike hit the floor to minimise any damage
Oathbound Bonus Rewards – Part 1.3 – Stage 2 of 2 – Assist in defeating The Ageless Champion
Oathbound Bonus Rewards – Part 1 – Quest Completed
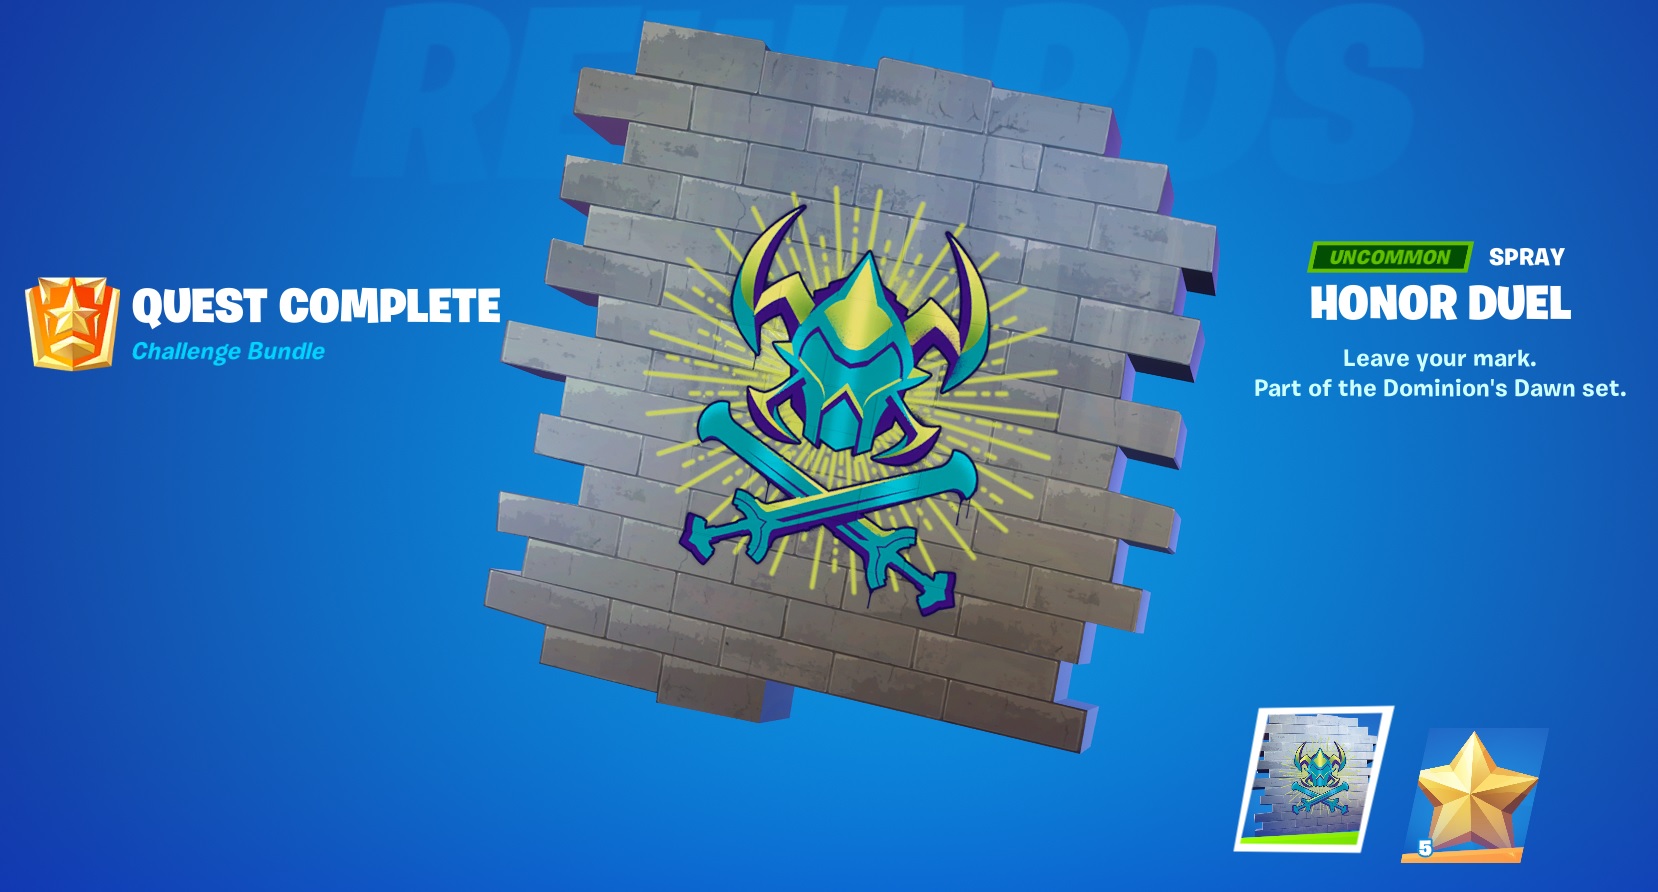
And there you have it, Quest completed and a new FREE Spray. I do wish Epic would add more story and possible closing scene to these quests, make them a bit deeper and so will make them more interesting.
Fortnite – Oathbound Reward – Honor Duel Spray
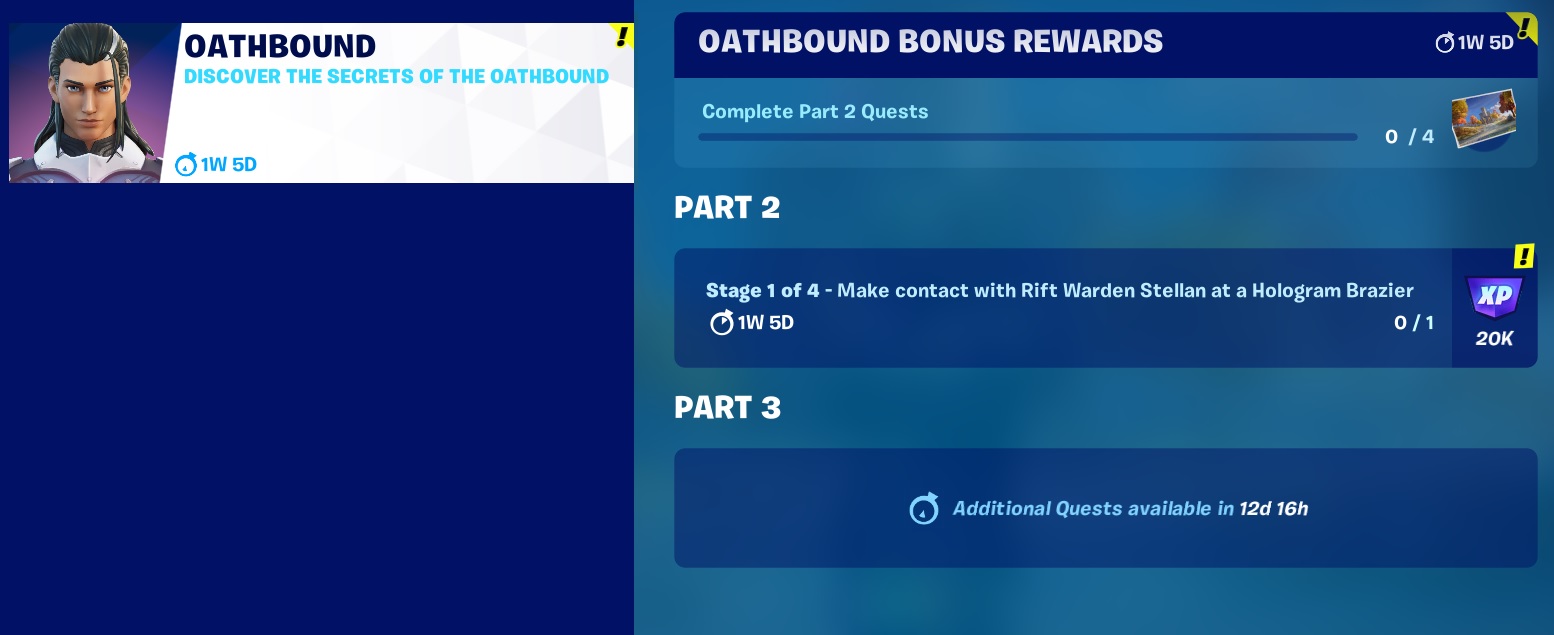
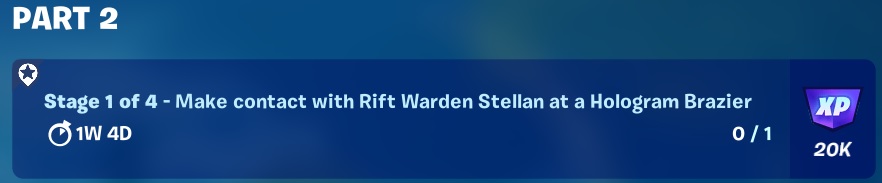
Oathbound Bonus Rewards – Part 2 – Stage 1 of 4 – Make Contact with Rift Warden Stellan at a Brazier
Oathbound Bonus Rewards – Part 2 – Stage 1 of 4 – Make Contact with Rift Warden Stellan at a Brazier
The Wallpaper reward is received after completing 4 Parts within the major PART 2 Quest line, broken down into sub quests that there are 4.
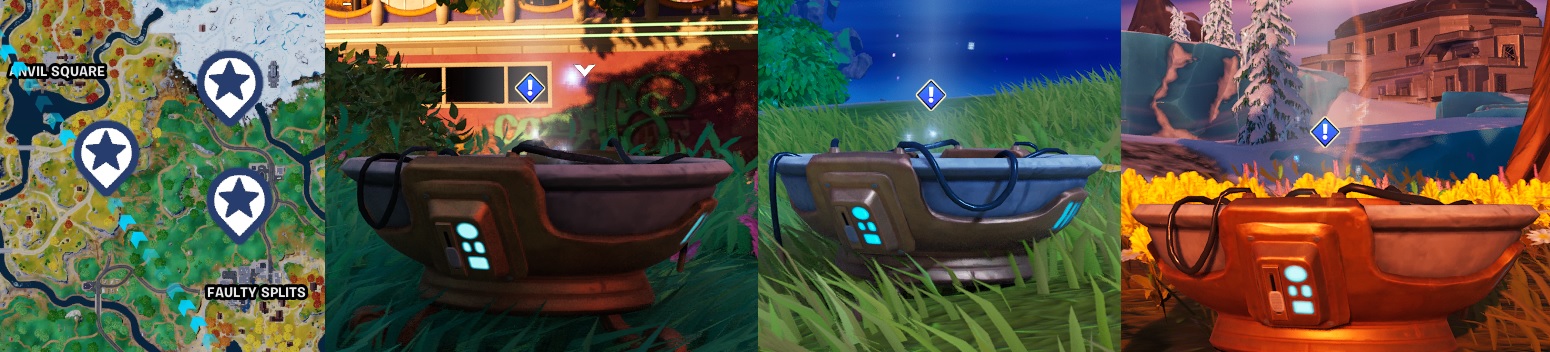
Stage 1, use the “track quest” option in the quest menu and check the map for the locations of the Hologram Brazier. You only need to go to one of these locations and interact with the Hologram Brazier
Oathbound Bonus Rewards – Part 2 – Stage 1 of 4 – Make Contact with Rift Warden Stellan at a BrazierGet your very own, Cracked at Fortnite T-Shirts
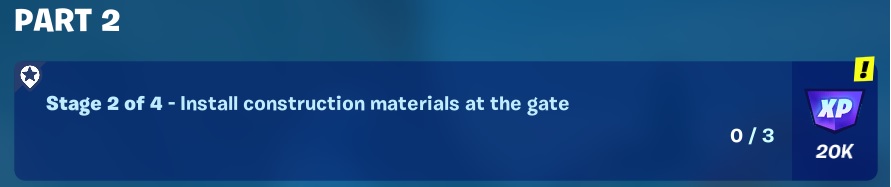
Oathbound Bonus Rewards – Part 2 – Stage 2 of 4 – install construction materials at the gate
Oathbound Bonus Rewards – Part 2 – Stage 2 of 4 – install construction materials at the gate
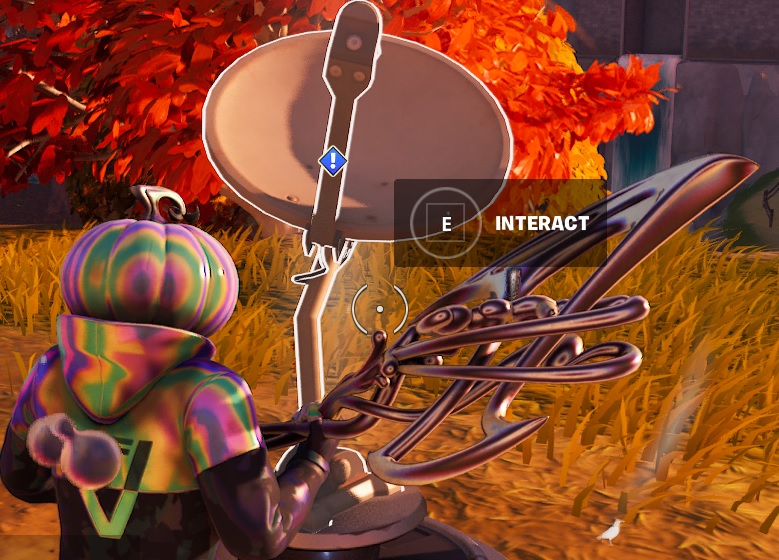
Use the “track quest” option in the quest menu and drop on the location to the east of The Citadel. All 3 construction materials are close together at the base of the tower. You have 3 items to interact with.
Oathbound Bonus Rewards – Part 2 – Stage 2 of 4 – install construction materials at the gate
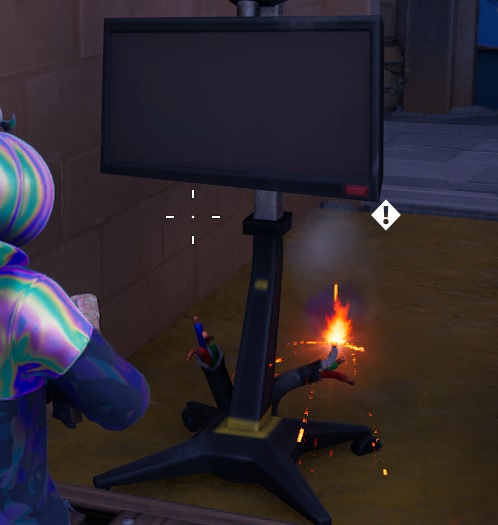
Oathbound Bonus Rewards – Part 2 – Stage 3 of 4 – Repair malfunctioning electronics by damaging them
Come on Epic, couldn’t come up with anything better? repair by damage! /sigh
Oathbound Bonus Rewards – Part 2 – Stage 3 of 4 – Repair malfunctioning electronics by damaging them
Same location so you should be able to complete in the same match. Give the damaged wires a whack with your harvesting tool!
Oathbound Bonus Rewards – Part 2 – Stage 3 of 4 – Repair malfunctioning electronics by damaging them
Oathbound Bonus Rewards – Part 2 – Stage 4 of 4 – Calibrate signal tech
Oathbound Bonus Rewards – Part 2 – Stage 4 of 4 – Calibrate signal tech
Find some more tech to interact with. They will be close by
Oathbound Bonus Rewards – Part 2 – Stage 4 of 4 – Calibrate signal tech
Oathbound Bonus Rewards – Part 2.1 – Stage 1 of 4 – Make contact with Rift Warden Stellan at a Hologram Brazier
Oathbound Bonus Rewards – Part 2.1 – Make contact with Rift Warden Stellan at a Hologram Brazier
More Hologram Brazier message thingies to find and listen too. You only need to go to one of them.
Oathbound Bonus Rewards – Part 2.1 – Make contact with Rift Warden Stellan at a Hologram Brazier
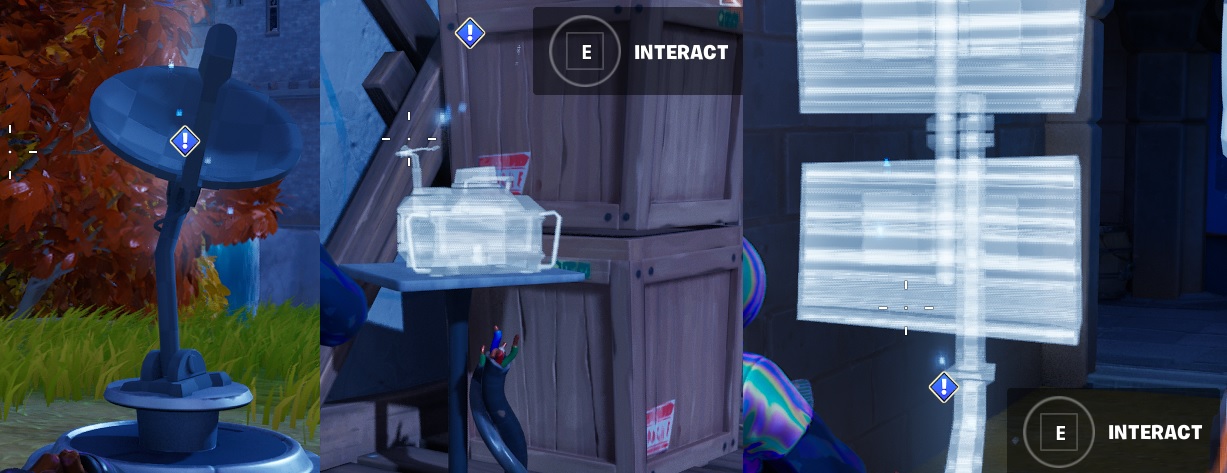
Oathbound Bonus Rewards – Part 2.1 – Stage 2 of 4 – Plant star sensors and cosmic monitor
Oathbound Bonus Rewards – Part 2.1 – Stage 2 of 4 – Plant star sensors and cosmic monitor
In the same location, have a look around for some “ghost” outlines of equipment and interact with them to deploy them
Oathbound Bonus Rewards – Part 2.1 – Stage 2 of 4 – Plant star sensors and cosmic monitor
Oathbound Bonus Rewards – Part 2.1 – Stage 3 of 4 – Align Star Sensors by damaging them in the correct order
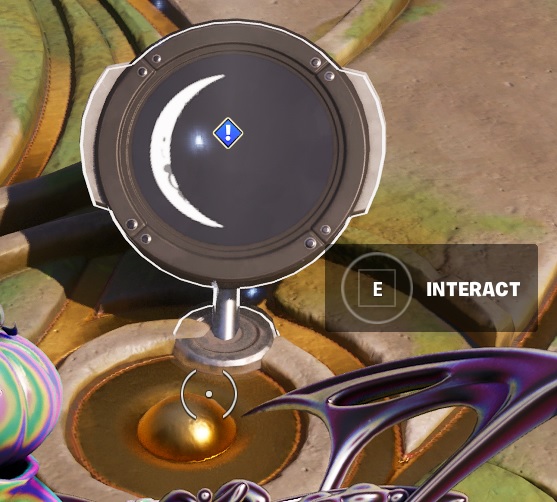
Now this is a bit more interesting Quest and a lot like the Indiana Jones one from Chapter 3. You need to wake the moon symbols in a sequence. If you get it right them, they change color slightly and will look the moons here. If they are not in the right order, they will not change color.
This is the order you need to whack the stones in:
Oathbound Bonus Rewards – Part 2.1 – Stage 3 of 4 – Align Star Sensors
Oathbound Bonus Rewards – Part 2.1 – Stage 4 of 4 – Interact with cosmos monitor
Finally, return to the centre dial and complete the sequence. All the moon stages should be flashing in their correct order to complete.
Oathbound Bonus Rewards – Part 2.1 – Stage 3 of 4 – Align Star Sensors
Get your very own, Cracked at Fortnite T-Shirts
Oathbound Bonus Rewards – Part 2.2 – Stage 1 of 2 – make contact with AMIE at a Hologram Brazier
Oathbound Bonus Rewards – Part 2.2 – Stage 1 of 2 – make contact with AMIE at a Hologram Brazier
More Hologram messages to listen too, for short story progression. Just need to find one, not all three. Track the quest and check your location for a good drop zone.
Oathbound Bonus Rewards – Part 2.2 – Stage 1 of 2 – make contact with AMIE at a Hologram Brazier – Location
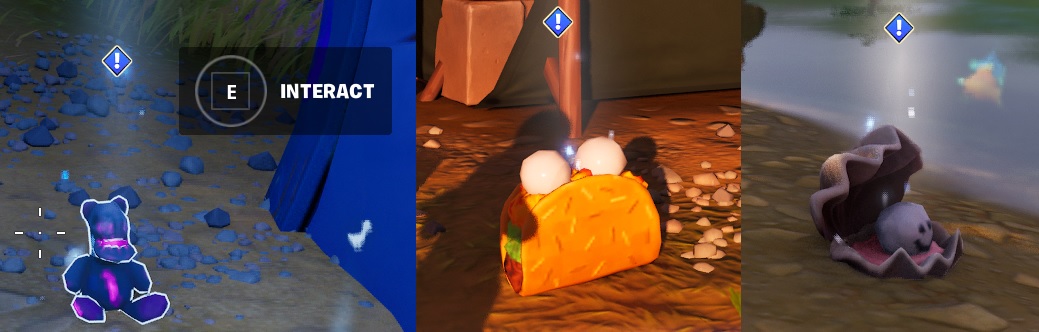
Oathbound Bonus Rewards – Part 2.2 – Stage 2 of 2 – Collect three objects to act as AI test vessels in a single match
Oathbound Bonus Rewards – Part 2.2 – Stage 2 of 2 – Collect three objects to act as AI test vessels in a single match
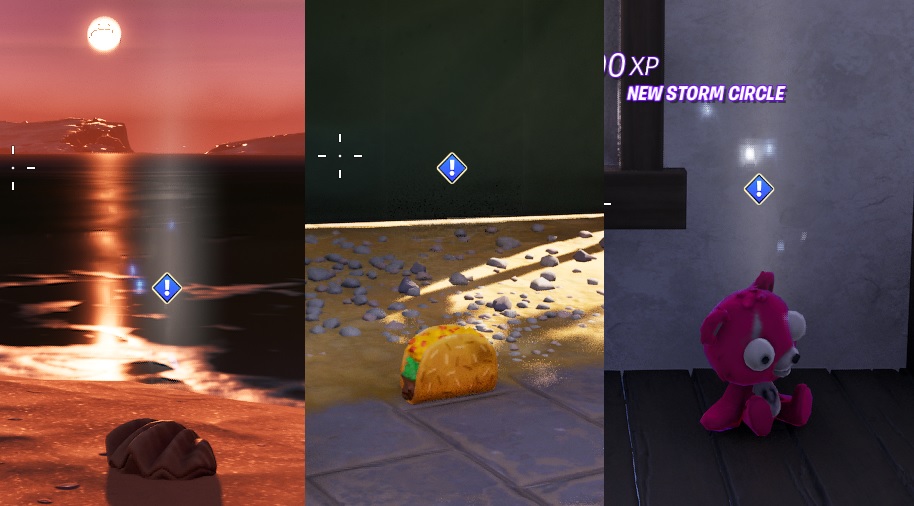
Track the quest and check the map. Drop at the far west beach and work your way in-land to collect:
Shell on the beach
Taco on the floor next to a market stall
Pink Teddy inside the house
Oathbound Bonus Rewards – Part 2.2 – Stage 2 of 2 – Collect three objects to act as AI test vessels in a single match – Location
Oathbound Bonus Rewards – Part 2.3 – Stage 1 of 3 – make contact with AMIE at a Hologram Brazier
Oathbound Bonus Rewards – Part 2.3 – Stage 1 of 3 – make contact with AMIE at a Hologram Brazier
Track the quest and check the map, looking for more Hologram Brazier so you can get further orders
Oathbound Bonus Rewards – Part 2.3 – Stage 1 of 3 – make contact with AMIE at a Hologram Brazier
Oathbound Bonus Rewards – Part 2.3 – Stage 2 of 3 – Send the test vessels through AMIE’s test Rift
Oathbound Bonus Rewards – Part 2.3 – Stage 2 of 3 – Send the test vessels through AMIE’s test Rift
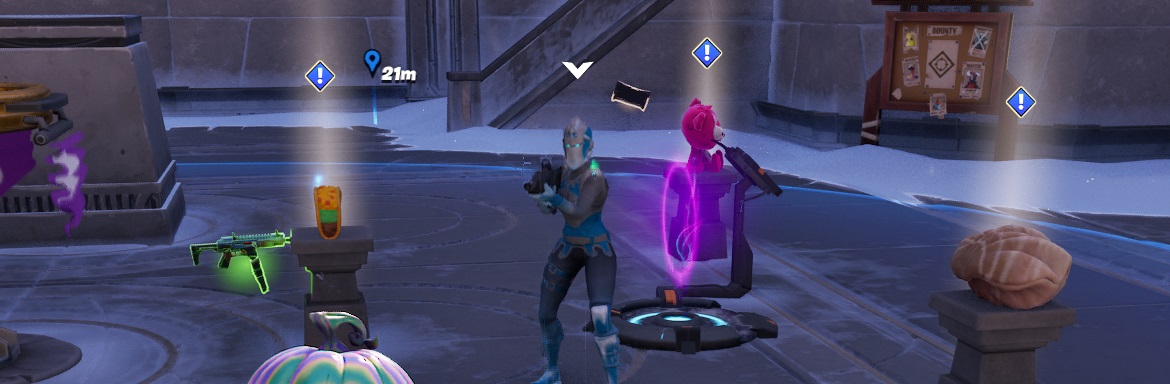
Now this is getting a bit more interesting! Head to Brutal Bastion, it’s a Hot Drop so there is going to be action, but pick up Frozen Red Knight to help you out, and also grab the Fortnite capture point for some loot. All the items you need to interact are in the main court yard.
Oathbound Bonus Rewards – Part 2.3 – Stage 2 of 3 – Send the test vessels through AMIE’s test Rift – Locations
Oathbound Bonus Rewards – Part 2.3 – Stage 2 of 3 – Recover AMIE’s test vessels and observe the results
Oathbound Bonus Rewards – Part 2.3 – Stage 2 of 3 – Recover AMIE’s test vessels and observe the results
Track the quest and check the map, you need to head to 3 locations to collect the rifted items. They didn’t look like this before they went in!
Oathbound Bonus Rewards – Part 2.3 – Stage 2 of 3 – Recover AMIE’s test vessels and observe the results
Oathbound Bonus Rewards – Part 2 Completed!
Well, not a great reward, would much prefer a skin or wrap but it all adds to the collection! have you collected ALL the Fortnite Characters Locations ??
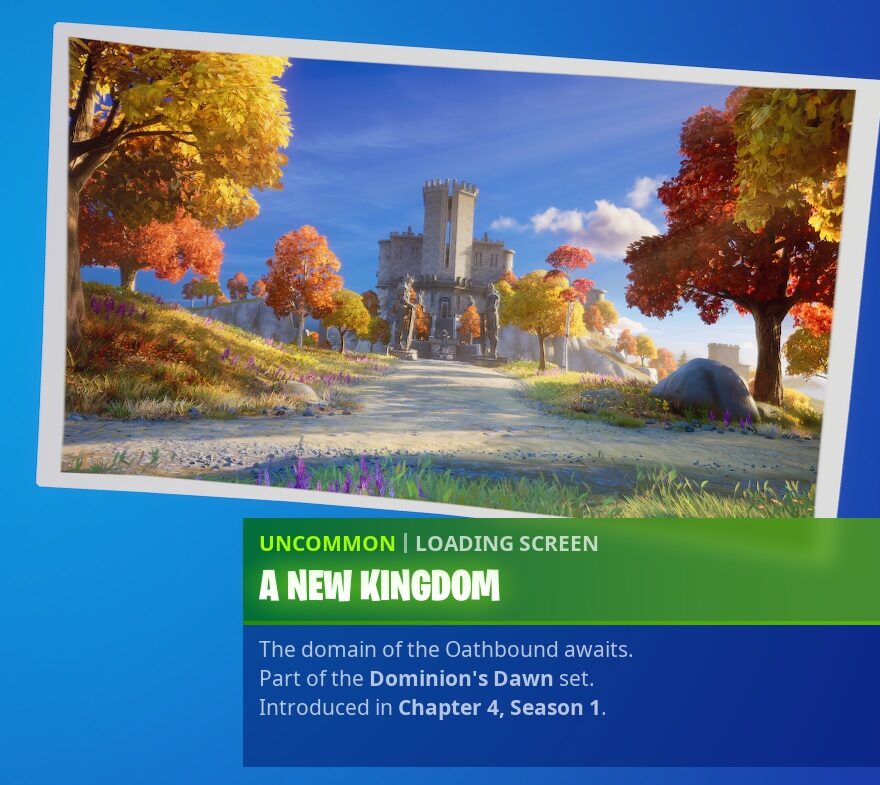
Oathbound Bonus Rewards – Part 2 – Completed – A New Kingdom
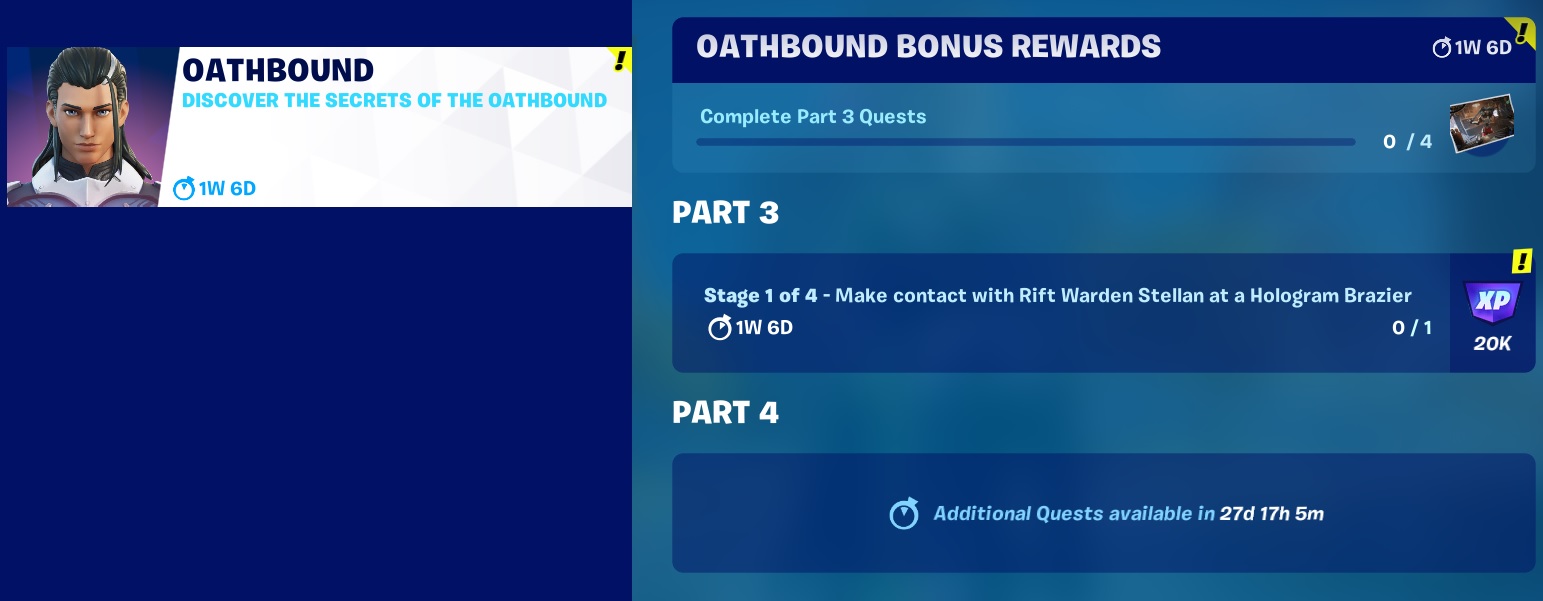
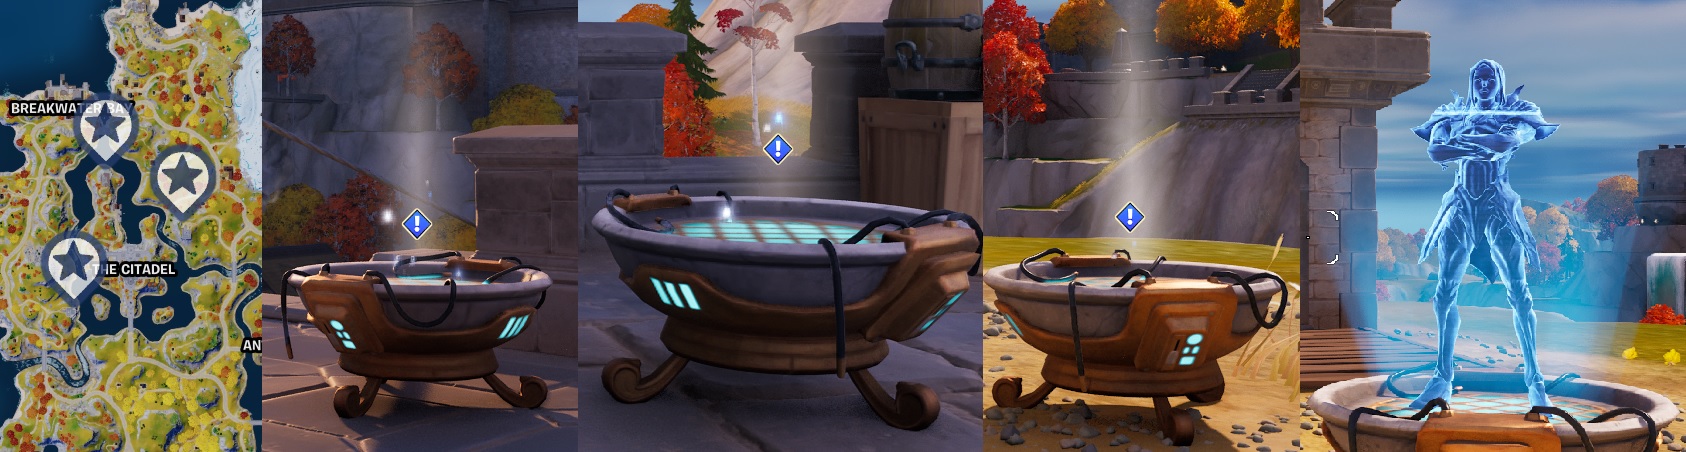
Oathbound Bonus Rewards – Part 3 – Stage 1 of 4 – Make Contact with Rift Warden Stellam at a Hologram Brazier
Oathbound Bonus Rewards – Part 3 – Stage 1 of 4 – Make Contact with Rift Warden Stellan at a Hologram Brazier
Wallpaper loading screen up for grabs this time, and another round of messages at the Hologram Brazier. Track the quest and check your map, 3 drop locations to choose from, drop at one and listen to the message
Oathbound Bonus Rewards – Part 3 – Stage 1 of 4 – Make Contact with the Rift Warden Stellam at a Hologram Brazier – LocationsGet your very own, Cracked at Fortnite T-Shirts
Oathbound Bonus Rewards – Part 3 – Stage 2 of 4 – Outfit The Citadel with tech equipment
Oathbound Bonus Rewards – Part 3 – Stage 2 of 4 – Outfit The Citadel with tech equipment
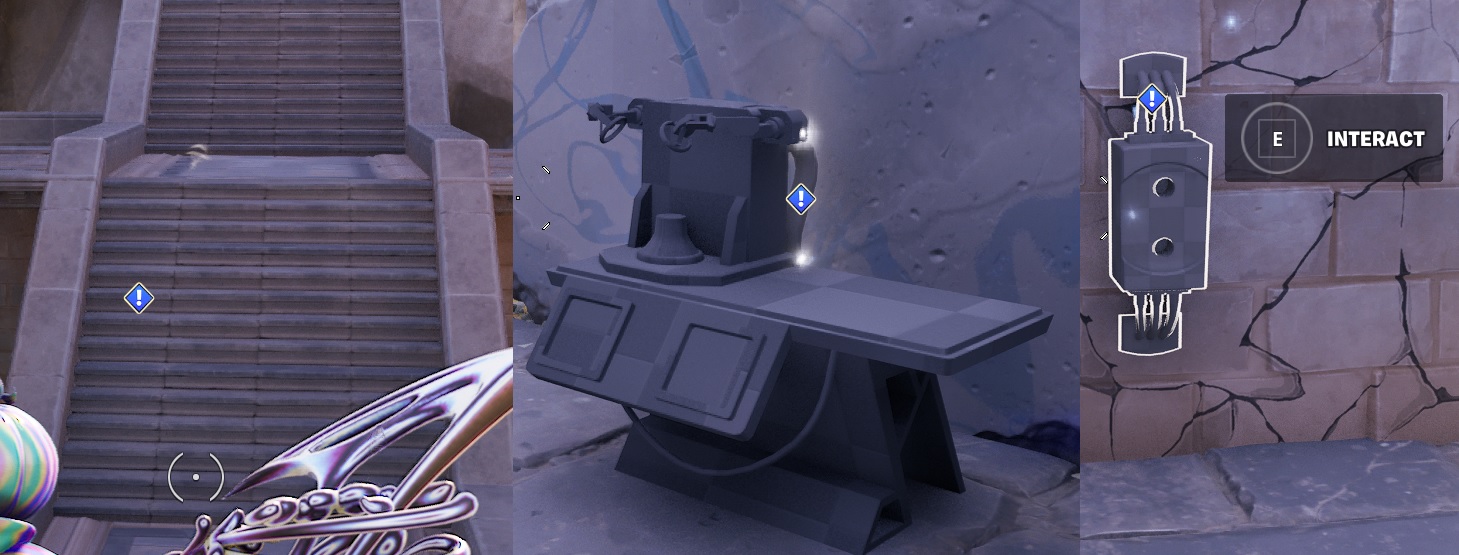
You need to collect 2 bits of Tech equipment, they are Under the Stairs at the main entrance. Look to the side of the stairs and you will find a passageway, and an Oathbound chest sometimes, totaly hotspot so watch out!
Oathbound Bonus Rewards – Part 3 – Stage 2 of 4 – Outfit The Citadel with tech equipment – Location
Oathbound Bonus Rewards – Part 3 – Stage 3 of 4 – Find a power plug
Oathbound Bonus Rewards – Part 3 – Stage 3 of 4 – Find a power plug
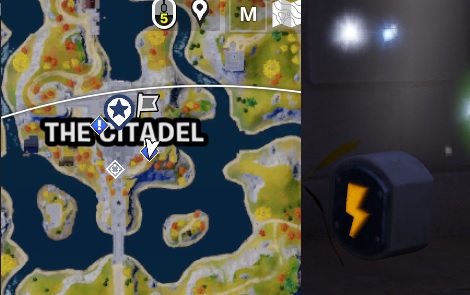
There are a 2 plugs around The Citadel, you may need to hunt around but they are not far.
Oathbound Bonus Rewards – Part 3 – Stage 3 of 4 – Find a power plug – Location
Oathbound Bonus Rewards – Part 3 – Stage 4 of 4 – Place the plug in the power socket
Oathbound Bonus Rewards – Part 3 – Stage 4 of 4 – Place the plug in the power socket
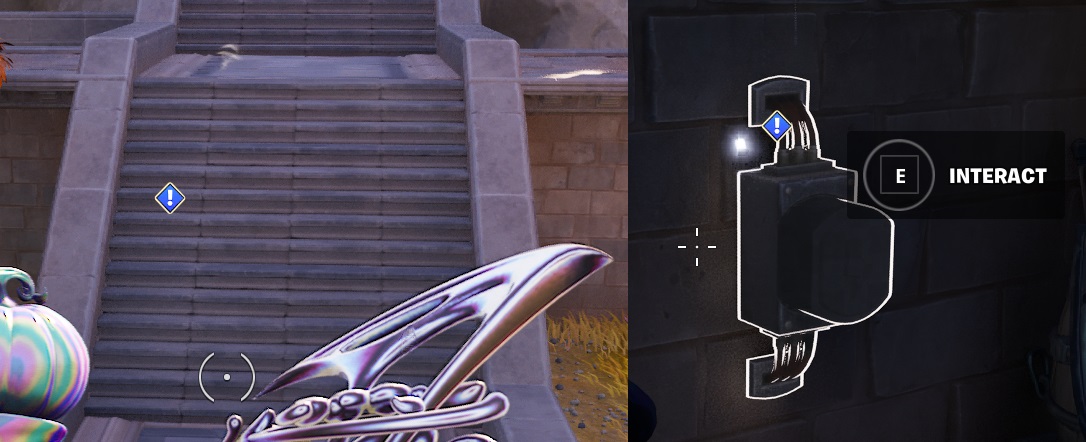
Back to the location under the front entrance main stairs. Interact to plug the plug in, BOOM, Part 3.1 done!
Oathbound Bonus Rewards – Part 3 – Stage 4 of 4 – Place the plug in the power socket – Location
Oathbound Bonus Rewards – Part 3.1 – Stage 1 of 2 – Make Contact with the Rift Warden Stellam at a Hologram Brazier
Oathbound Bonus Rewards – Part 3.1 – Stage 2 of 2 – Make Contact with the Rift Warden Stellam at a Hologram Brazier
Track the Quest and check the map, another 3 locations to choose from
Oathbound Bonus Rewards – Part 3.1 – Stage 1 of 2 – Make Contact with the Rift Warden Stellam at a Hologram Brazier – Locations
Oathbound Bonus Rewards – Part 3.1 – Stage 2 of 2 – Set up conduits at Brutal Bastion, Faulty Splits and Shattered Slabs
Oathbound Bonus Rewards – Part 3.1 – Stage 2 of 2 – Set up conduits at Brutal Bastion, Faulty Splits and Shattered Slabs
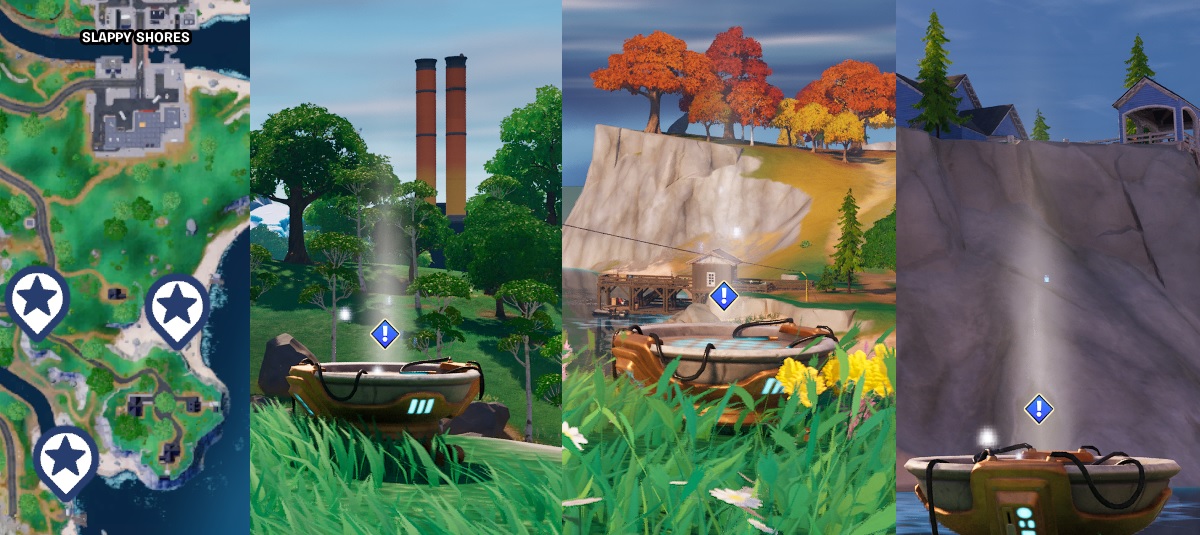
Little more interesting this one, travel to the 3 hot spots shown on the map, all out in the open and easy to spot, click on the conduits. They looks like Moisture vaporator on Tatooine
Oathbound Bonus Rewards – Part 3.1 – Stage 2 of 2 – Set up conduits at Brutal Bastion, Faulty Splits and Shattered Slabs – Locations
Oathbound Bonus Rewards – Part 3.2 – Stage 1 of 5 – Make Contact with Rift Warden Stellam at a Hologram Brazier
Oathbound Bonus Rewards – Part 3.2 – Stage 1 of 5 – Make Contact with Rift Warden Stellam at a Hologram Brazier
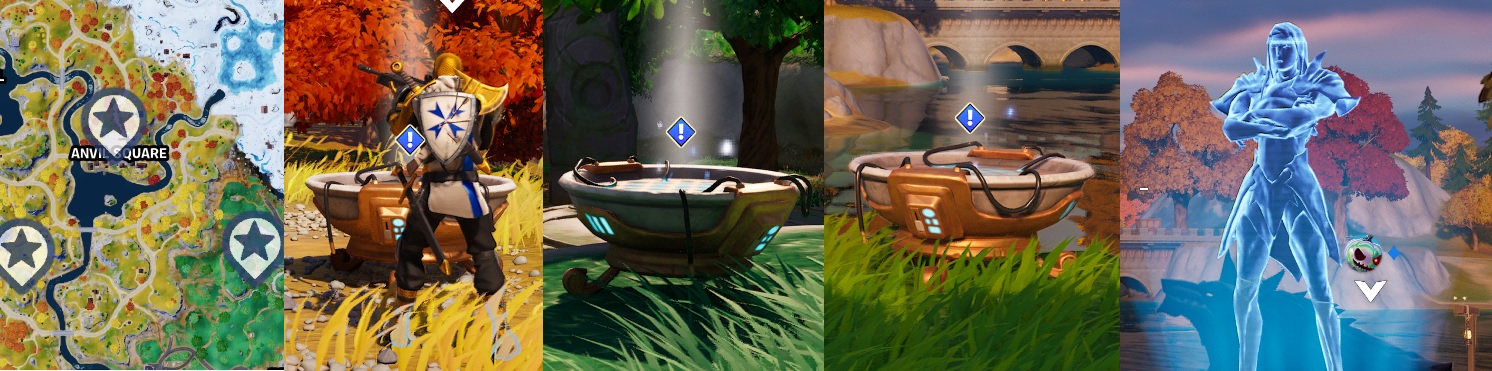
Another Brazier Quest, track the quest, check the map and pick a drop location. Nice drop location to grab the new Hired NPC Character
Oathbound Bonus Rewards – Part 3.2 – Stage 1 of 5 – Make Contact with Rift Warden Stellam at a Hologram Brazier – Location
Oathbound Bonus Rewards – Part 3.2 – Stage 2 of 5 – Damage metal stuctures to collect alloy pieces
Oathbound Bonus Rewards – Part 3.2 – Stage 2 of 5 – Damage metal stuctures to collect alloy pieces
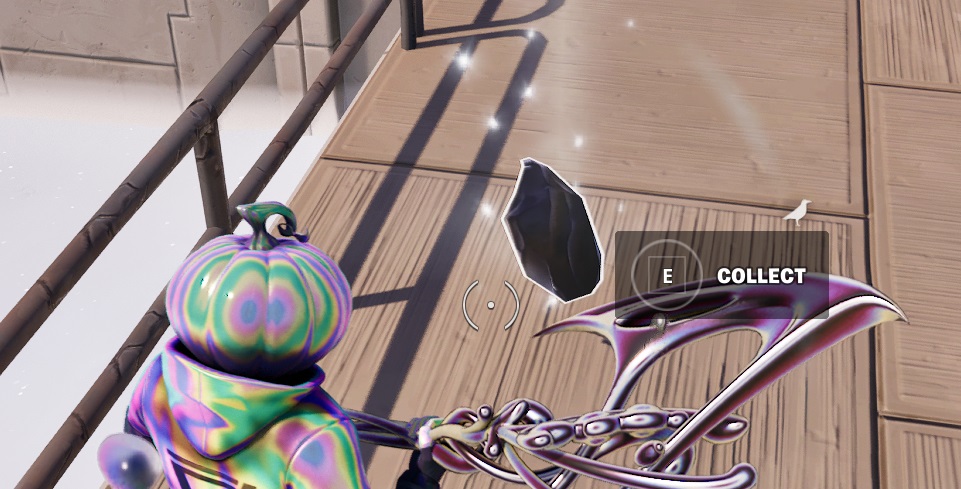
Find any metal structure, and use your harvesting tool. Eventualy some black ore should drop to the ground, pick up up fast, it wont stick around long, you have 5 to collect.
Oathbound Bonus Rewards – Part 3.2 – Stage 2 of 5 – Damage metal stuctures to collect alloy pieces – Locations
Oathbound Bonus Rewards – Part 3.2 – Stage 3 of 5 – Place the alloy in a Forge Brazier to heat the metal
Oathbound Bonus Rewards – Part 3.2 – Stage 3 of 5 – Place the alloy in a Forge Brazier to heat the metal
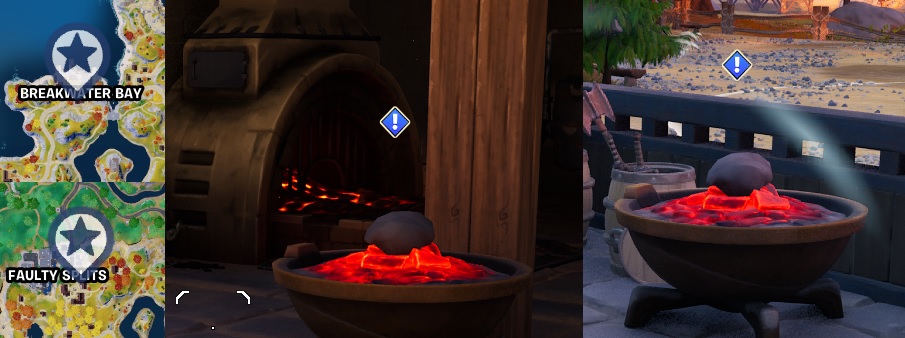
You ahve 2 forge’s to choose from. Both at hot spots so good luck and be FAST, in and out. These few quest stages can be completed together in one match if you are fast. All parts are located in the Blacksmiths area.
Oathbound Bonus Rewards – Part 3.2 – Stage 3 of 5 – Place the alloy in a Forge Brazier to heat the metal – Locations
Oathbound Bonus Rewards – Part 3.2 – Stage 4 of 5 – Place the heated alloy on an anvil
Oathbound Bonus Rewards – Part 3.2 – Stage 4 of 5 – Place the heated alloy on an anvil
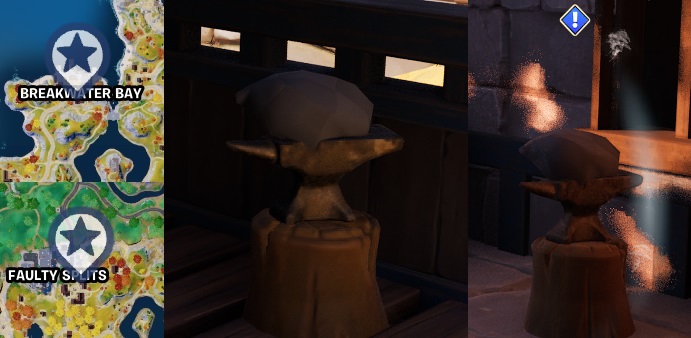
Very close to the Forge, you should find an anvil, interact with it to complete the next stage
Oathbound Bonus Rewards – Part 3.2 – Stage 4 of 5 – Place the heated alloy on an anvil – Locations
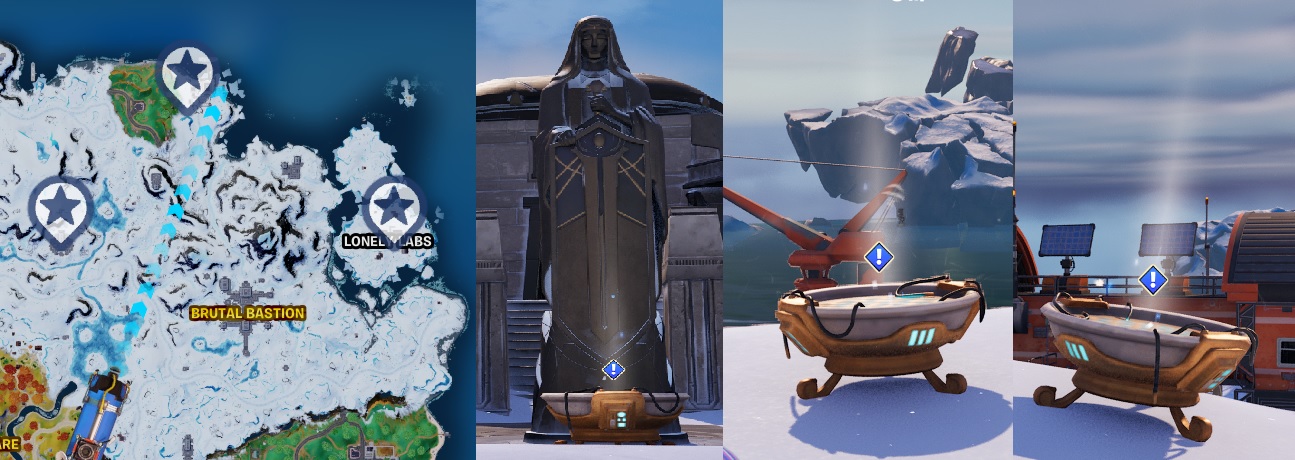
Oathbound Bonus Rewards – Part 3.2 – Stage 5 of 5 – Refine the alloy by hitting it with the harvesting tool
Oathbound Bonus Rewards – Part 3.2 – Stage 5 of 5 – Refine the alloy by hitting it with the harvesting tool
Give the Ore a wack with your harvesting tool, 5 times.
Oathbound Bonus Rewards – Part 3.2 – Stage 5 of 5 – Refine the alloy by hitting it with the harvesting tool – Locations
Oathbound Bonus Rewards – Part 3.3 – Stage 1 of 4 – make contact with AMIE at a Hologram Brazier
Oathbound Bonus Rewards – Part 3.3 – Stage 1 of 4 – make contact with AMIE at a Hologram Brazier
Find one of the locations and make contact, the status at the west locations looks cool
Oathbound Bonus Rewards – Part 3.3 – Stage 1 of 4 – make contact with AMIE at a Hologram Brazier – Locations
Oathbound Bonus Rewards – Part 3.3 – Stage 2 of 4 – Scan Players with a Falcon Scout and collect their schematic
Rebel, one of the new NPC Characters you can hire will help out here as she sells the Falcon scount for 250 gold. Check Fortnite Character Locations for the location
Oathbound Bonus Rewards – Part 3.3 – Stage 2 of 4 – Scan players with a Falcon Scout and collect their schematic
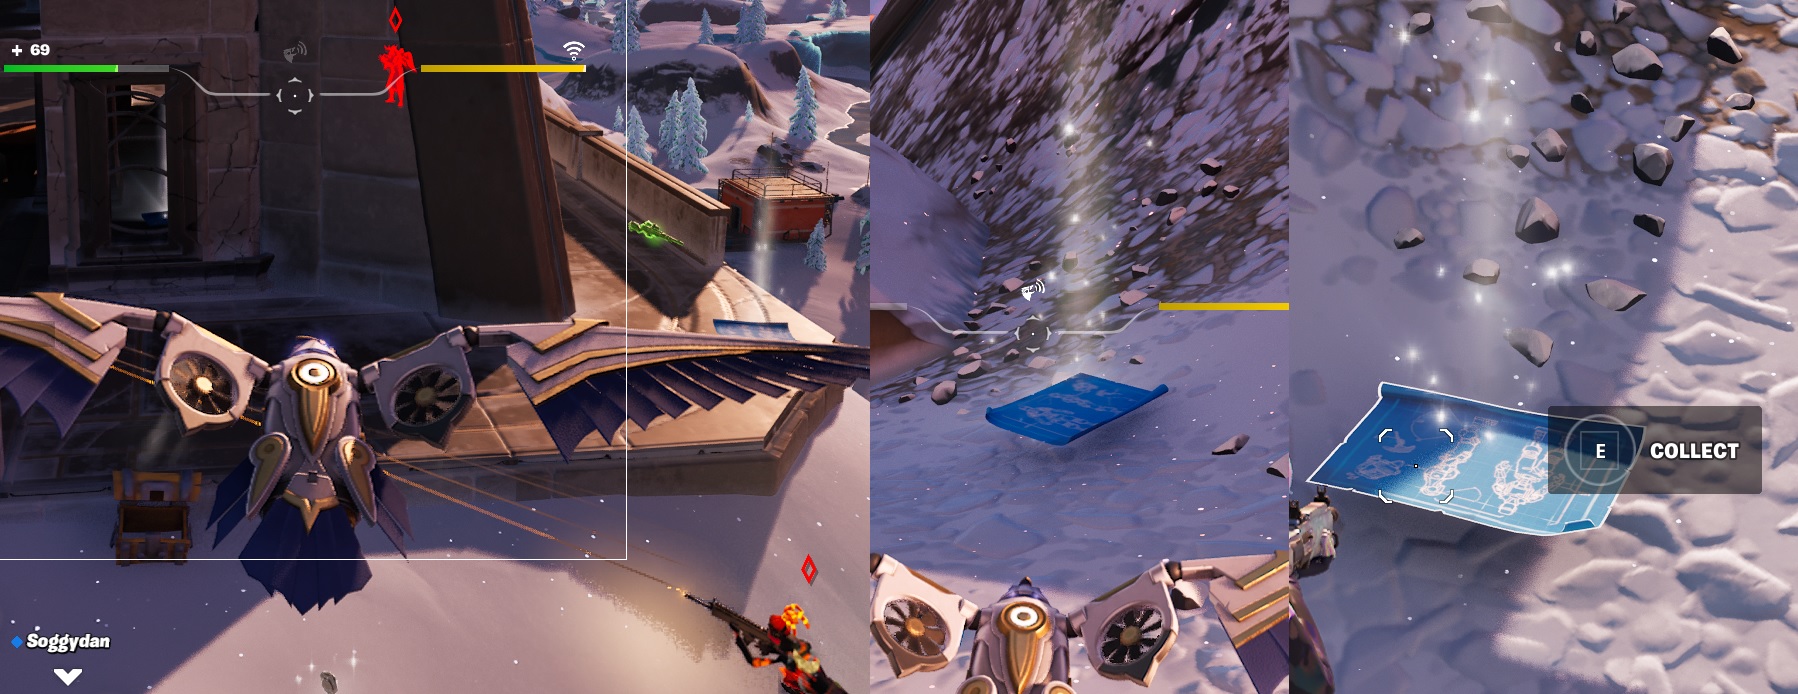
This quest is a little trickier, obtain a Falcon Scout, Hire Rebel is you can, find a hiding spot to launch the Scout. You need to find a player in close proximity and scan them, they should drop a Blue Print style plan, seems you can use the Falcon Scout to pick up the plans so you need to dismiss the Falcon Scout really quick and run over to collect it.
Oathbound Bonus Rewards – Part 3.3 – Stage 2 of 4 – Scan Players with a Falcon Scout and collect their schematic – LocationsGet your very own, Cracked at Fortnite T-Shirts
Oathbound Bonus Rewards – Part 3.3 – Stage 3 of 4 – Damage Guardian Shields and collect dropped micro chips
Oathbound Bonus Rewards – Part 3.3 – Stage 3 of 4 – Damage Guardian Shields and collect dropped micro chips
Slightly tricky this one, find a Guardian shield, more seem to be found in the medievil area of the map, deploy it and then shoot at it. Collect some chips that fall out.
Oathbound Bonus Rewards – Part 3.3 – Stage 3 of 4 – Damage Guardian Shields and collect dropped micro chips – Locations
Oathbound Bonus Rewards – Part 3.3 – Stage 4 of 4 – Activate AMIE’s body construction program
Oathbound Bonus Rewards – Part 3.3 – Stage 4 of 4 – Activate AMIE’s body construction program
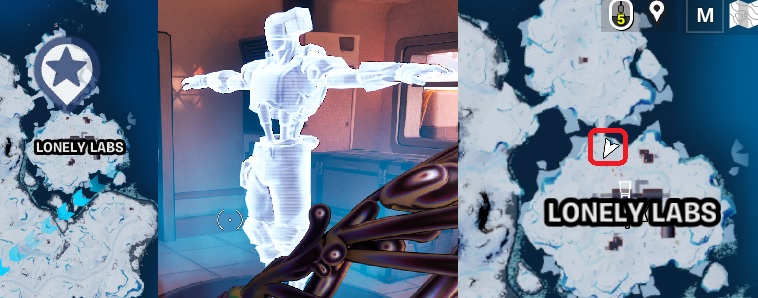
last stage of this quest line, drop in at Lonely Labs, thats not so Lonely anymore, its become a super hot spot since this quest, so be ready. The building you need is at the North side of the complex, in a small shack. Pop in and activete the floot panel.
Oathbound Bonus Rewards – Part 3.3 – Stage 4 of 4 – Activate AMIE’s body construction program – Locations
Oathbound Bonus Rewards – Part 3 Completed!
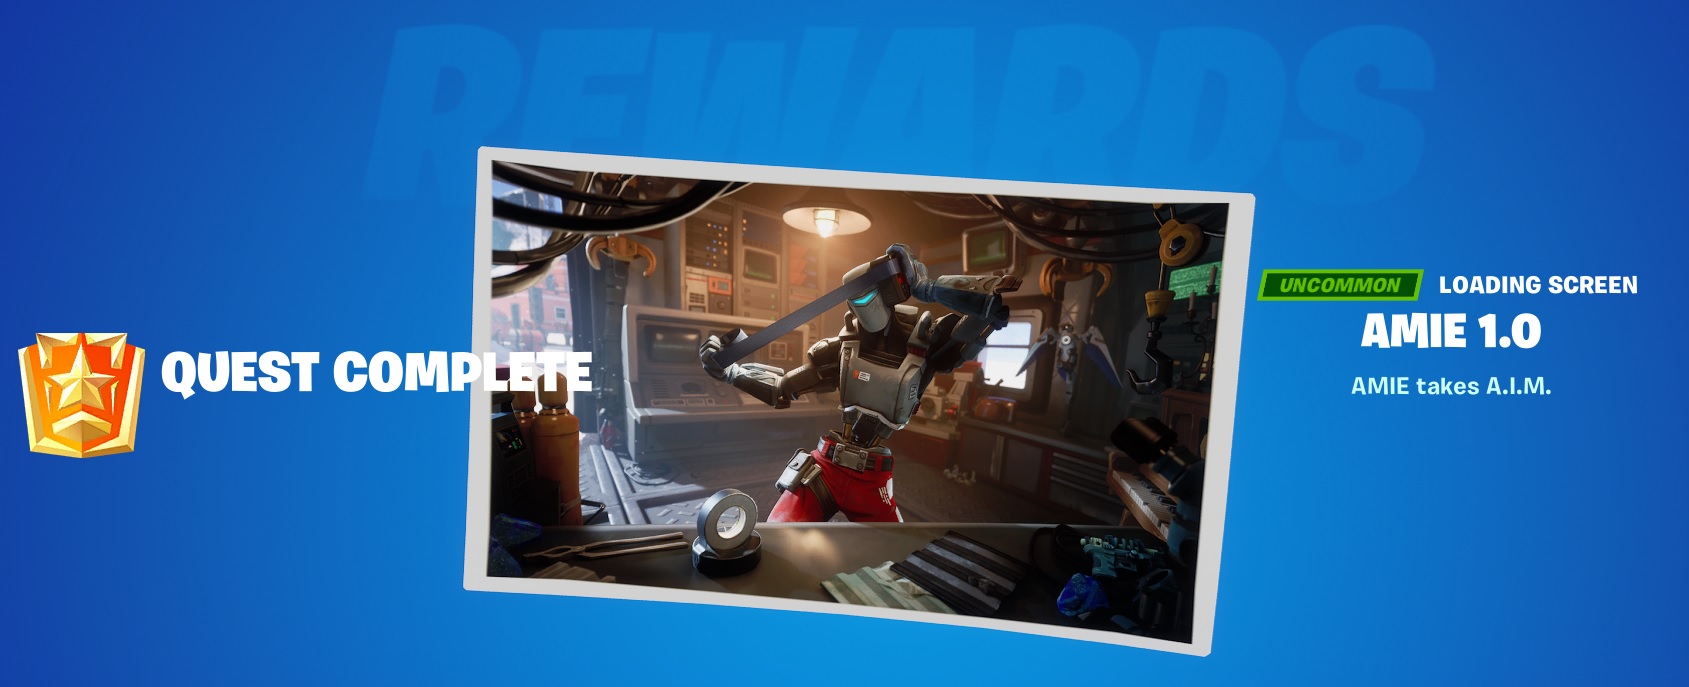
Another loading screen wallpaper thingy, pretty sweet laoding screen.
Oathbound Bonus Rewards – Part 3 – Complete – Reward
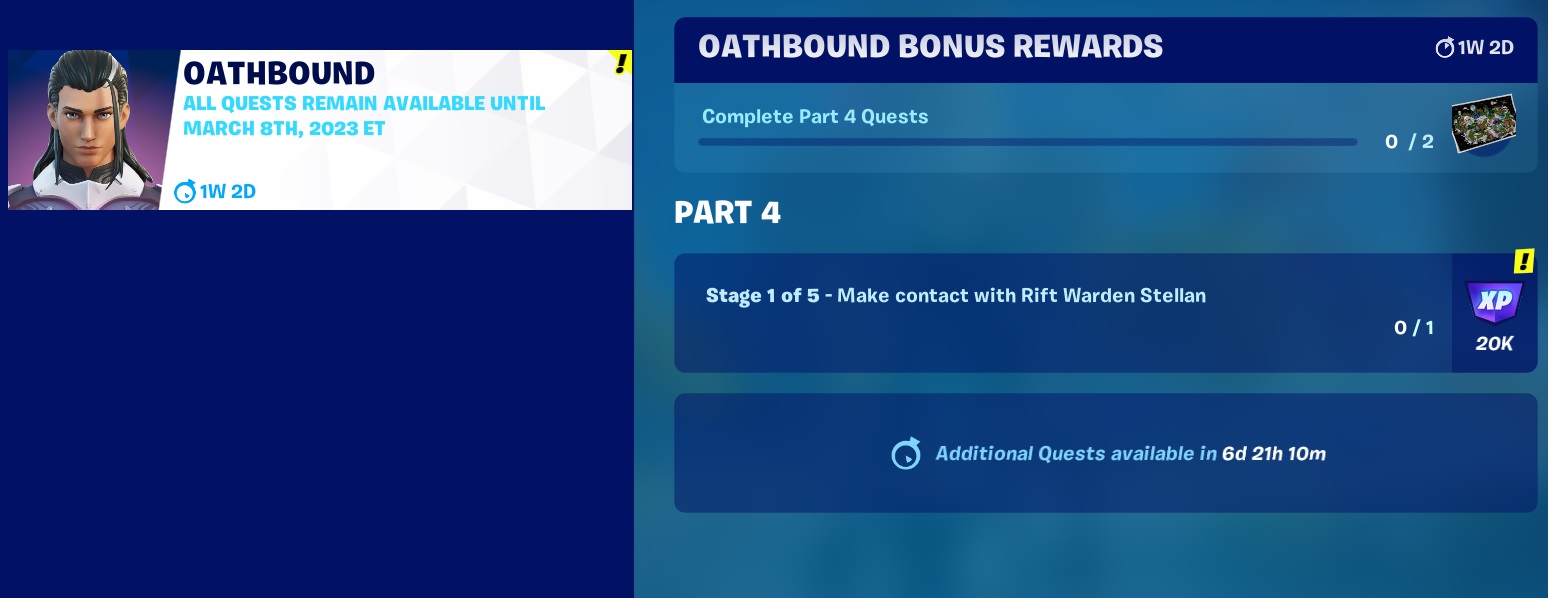
Oathbound Bonus Rewards – Part 4 – Stage 1 of 5 – Make Contact with Rift Warden Stellan
Oathbound Bonus Rewards – Part 4 – Stage 1 of 5 – Make Contact with Rift Warden Stellan
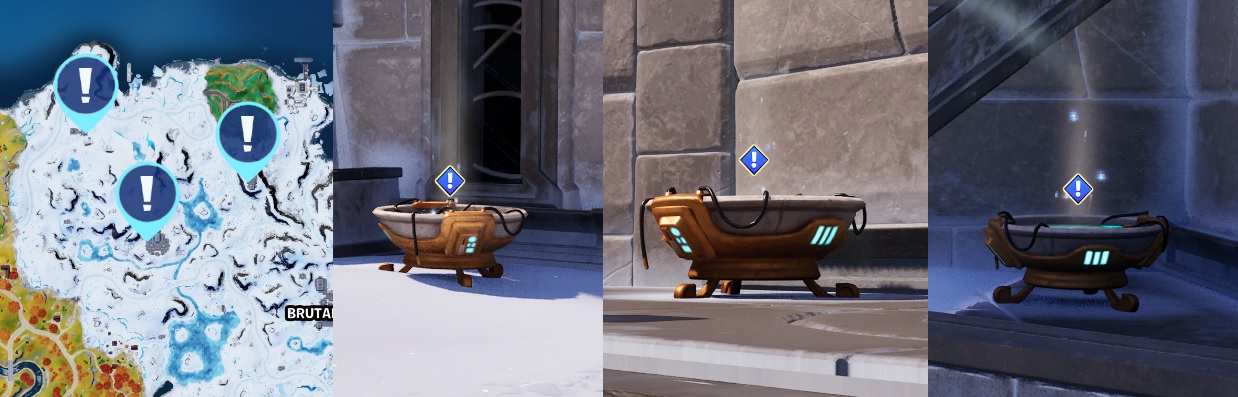
Another wallpaper loading screen up for grabs this time, and another round of messages at the Hologram Brazier. Track the quest and check your map, 3 drop locations to choose from, drop at one and listen to the message
All locations are in the northern snow covered area, outside the stone structures.
Oathbound Bonus Rewards – Part 4 – Stage 1 of 5 – Make Contact with Rift Warden Stellan – Locations
Oathbound Bonus Rewards – Part 4 – Stage 2 of 5 – Start deciphering Rift gate coordinates
Oathbound Bonus Rewards – Part 5 – Stage 2 of 5 – Start deciphering Rift gate coordinates
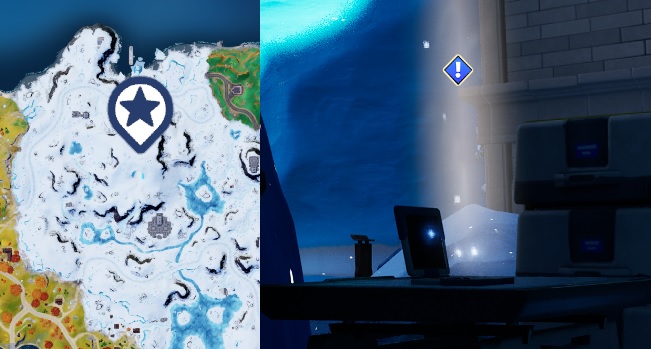
This is actualy INSIDE the snow cave. Your looking for a laptop on a desk. Access is either from north of south of the drop locations. You will find the NPC Snowheart at this location, along with the clock tower and Bounty Board.
Oathbound Bonus Rewards – Part 5 – Stage 2 of 5 – Start deciphering Rift gate coordinates – Locations
Oathbound Bonus Rewards – Part 4 – Stage 3 of 5 – Eliminate Players (3)
Oathbound Bonus Rewards – Part 4 – Stage 3 of 5 – Eliminate Players (3)
Oathbound Bonus Rewards – Part 4 – Stage 4 of 5 – Return to laptop to recieve Rift Gate coordinates
Oathbound Bonus Rewards – Part 4 – Stage 4 of 5 – Return to laptop to recieve Rift Gate coordinates
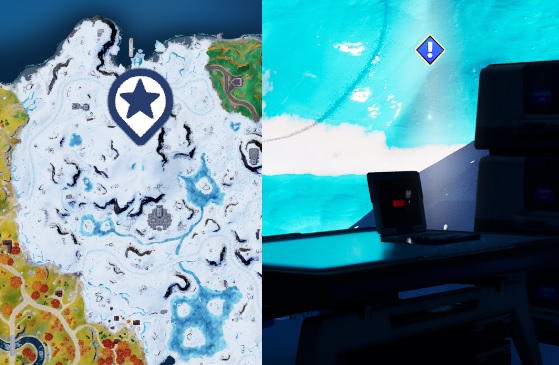
Back to the snow cave, find the laptop and get the coordinates
Oathbound Bonus Rewards – Part 4 – Stage 4 of 5 – Return to laptop to recieve Rift Gate coordinates – Locations
Oathbound Bonus Rewards – Part 4 – Stage 5 of 5 – Punch in coordinates at the Rift Gate Control Terminal
Oathbound Bonus Rewards – Part 4 – Stage 5 of 5 – Punch in coordinates at the Rift Gate Control Terminal
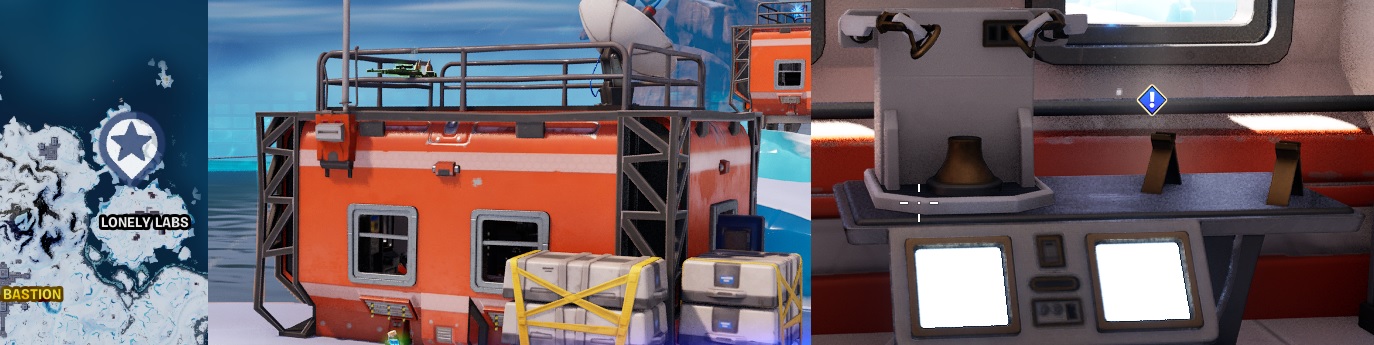
Head over to Lonley Labs to the northern red building, inside is the Control Terminal
Oathbound Bonus Rewards – Part 4 – Stage 5 of 5 – Punch in coordinates at the Rift Gate Control Terminal – Locations
Oathbound Bonus Rewards – Part 4.1 – Stage 1 of 3 – Make Contact with Rift Warden Stellan
Oathbound Bonus Rewards – Part 4.1 – Stage 1 of 3 – Make Contact with Rift Warden Stellam
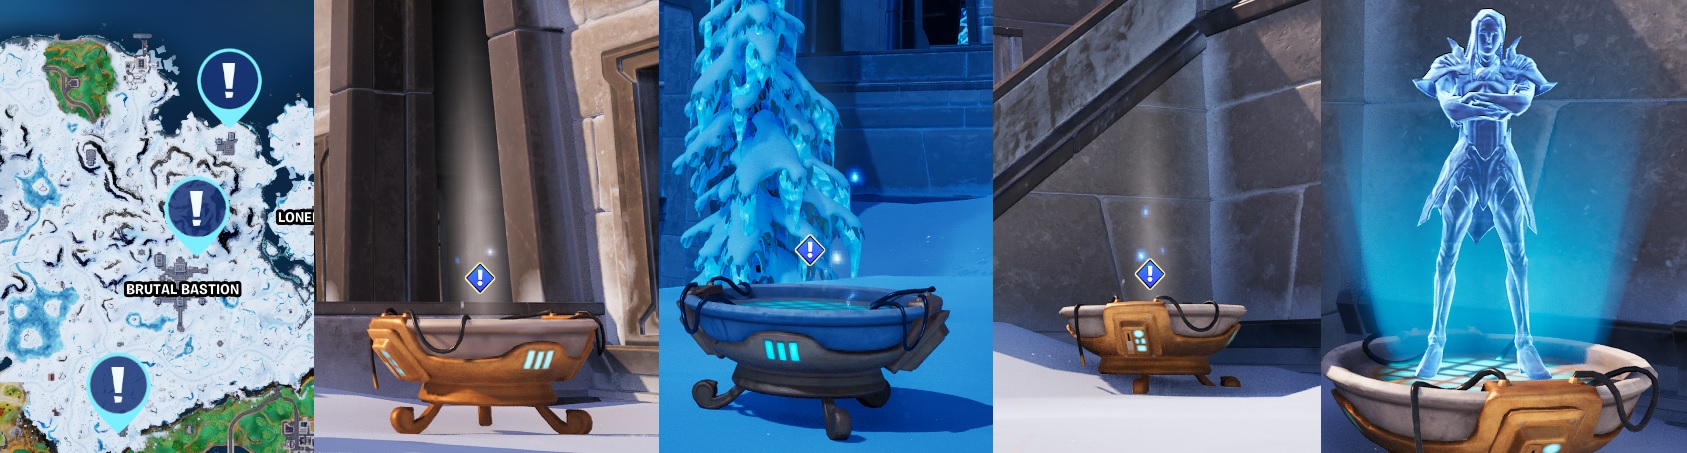
Pick one of the 3 locations to drop in at and listen to the message.
Oathbound Bonus Rewards – Part 4.1 – Stage 1 of 3 – Make Contact with Rift Warden Stellan – Locations
Oathbound Bonus Rewards – Part 4.1 – Stage 2 of 3 – Use the Rift Gate Control Terminal to open the Rift Gate
Oathbound Bonus Rewards – Part 4.1 – Stage 2 of 3 – Use the Rift Gate Control Terminal to open the Rift Gate
Back to Lonely Labs Outpost to get the next message
Oathbound Bonus Rewards – Part 4.1 – Stage 2 of 3 – Use the Rift Gate Control Terminal to open the Rift Gate – Locations
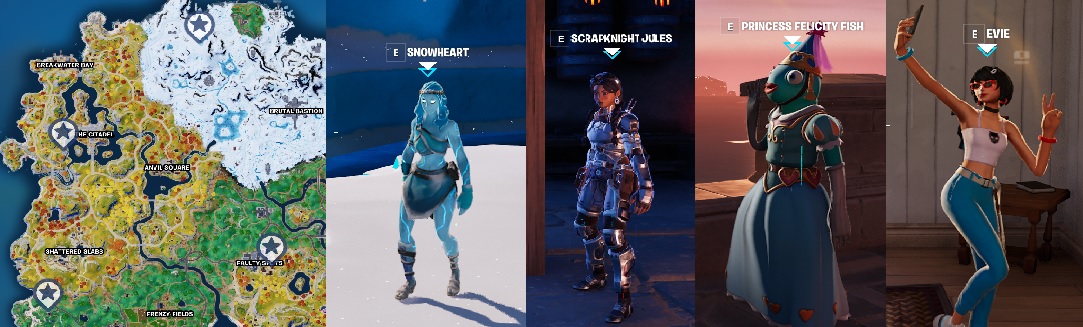
Oathbound Bonus Rewards – Part 4.1 – Stage 3 of 3 – Talk to Evie, Scrapnight Jules, Snowheart or Princess Felicity Fish
Oathbound Bonus Rewards – Part 4.1 – Stage 3 of 3 – Talk to Evie, Scrapnight Jules, Snowheart or Princess Felicity Fish
Oathbound Bonus Rewards – Part 4.1 – Stage 3 of 3 – Talk to Evie, Scrapnight Jules, Snowheart or Princess Felicity Fish – Locations
Get your very own, Cracked at Fortnite T-Shirts
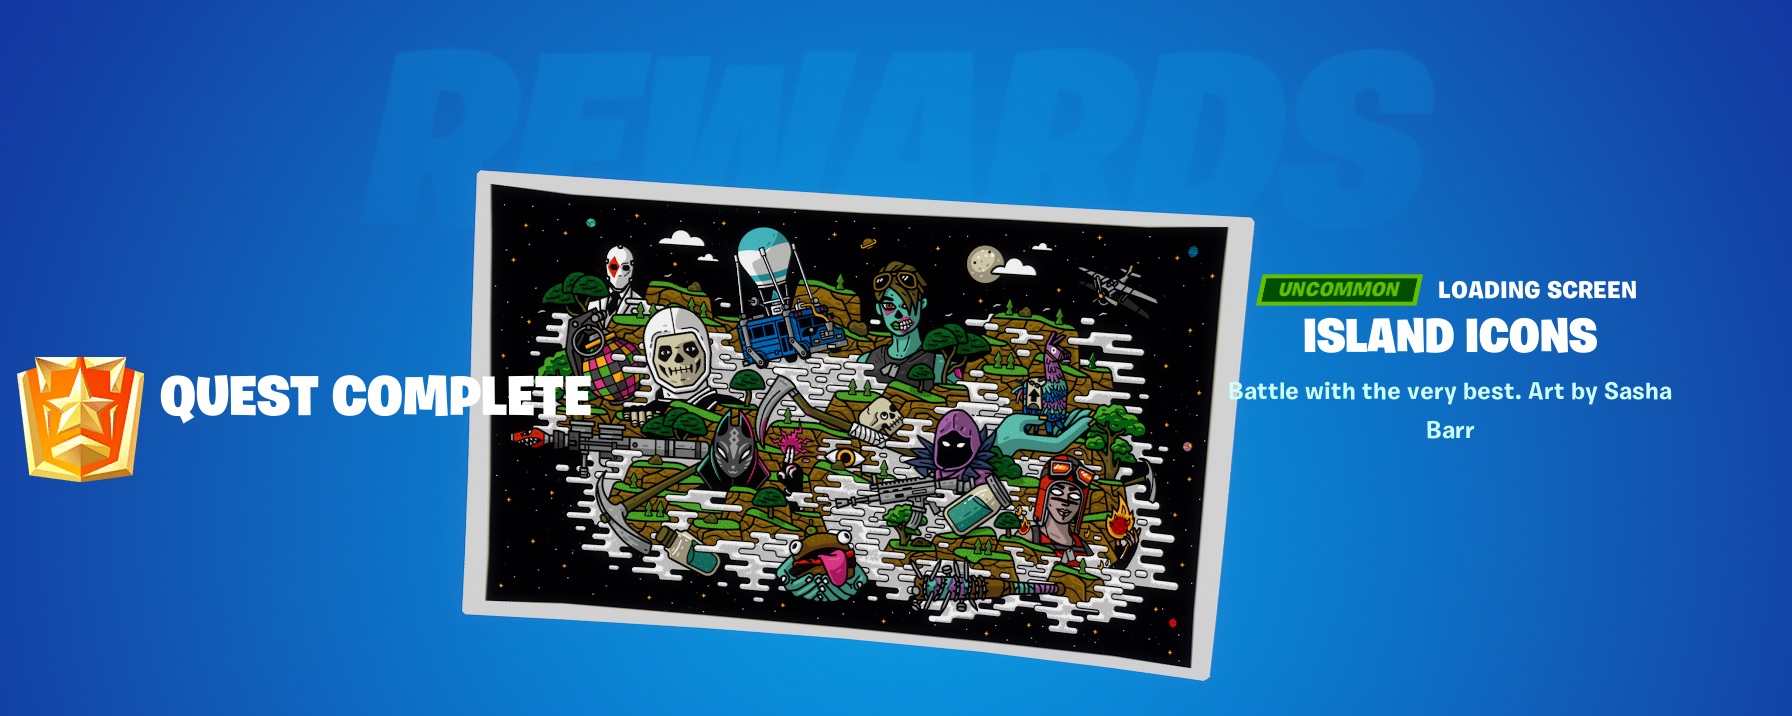
Oathbound Bonus Rewards – Part 4.1 Reward – Island Icons
Oathbound Bonus Rewards – Part 4.1 Reward – Island Icons
Oathbound Bonus Rewards – Part 4.2 – Stage 1 of 4 – Make Contact with Rift Warden Stellan
Oathbound Bonus Rewards – Part 4.2 – Make Contact with Rift Warden Stellan
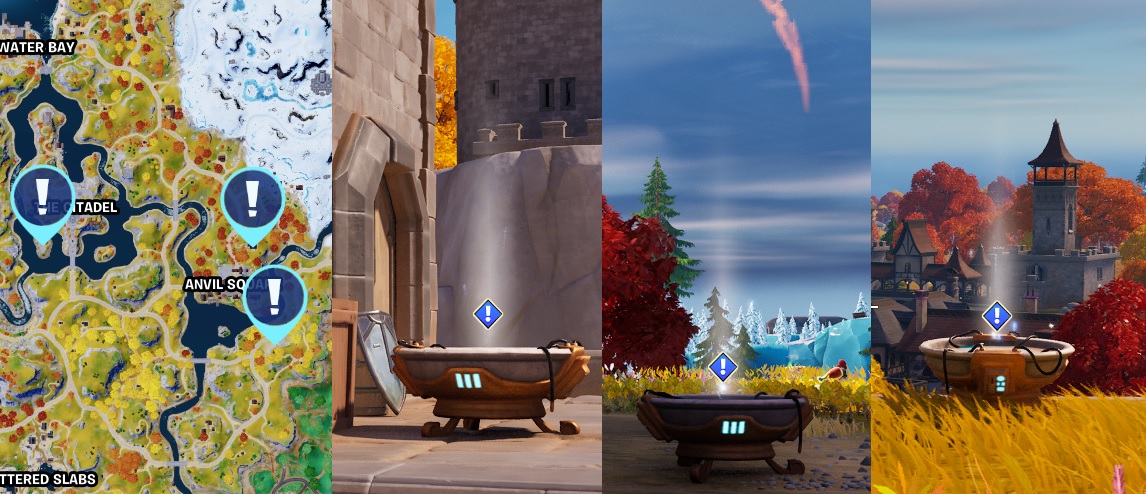
Another 3 locations to pick from, for easy completion head to the one on the hill, south of Anvil Square
Oathbound Bonus Rewards – Part 4.2 – Make Contact with Rift Warden Stellan – Locations
Oathbound Bonus Rewards – Part 4.2 – Stage 2 of 4 – Damage Oathbound Chests to retrieve Hard Drives
Oathbound Bonus Rewards – Part 4.2 – Stage 2 of 4 – Damage Oathbound Chests to retrieve Hard Drives
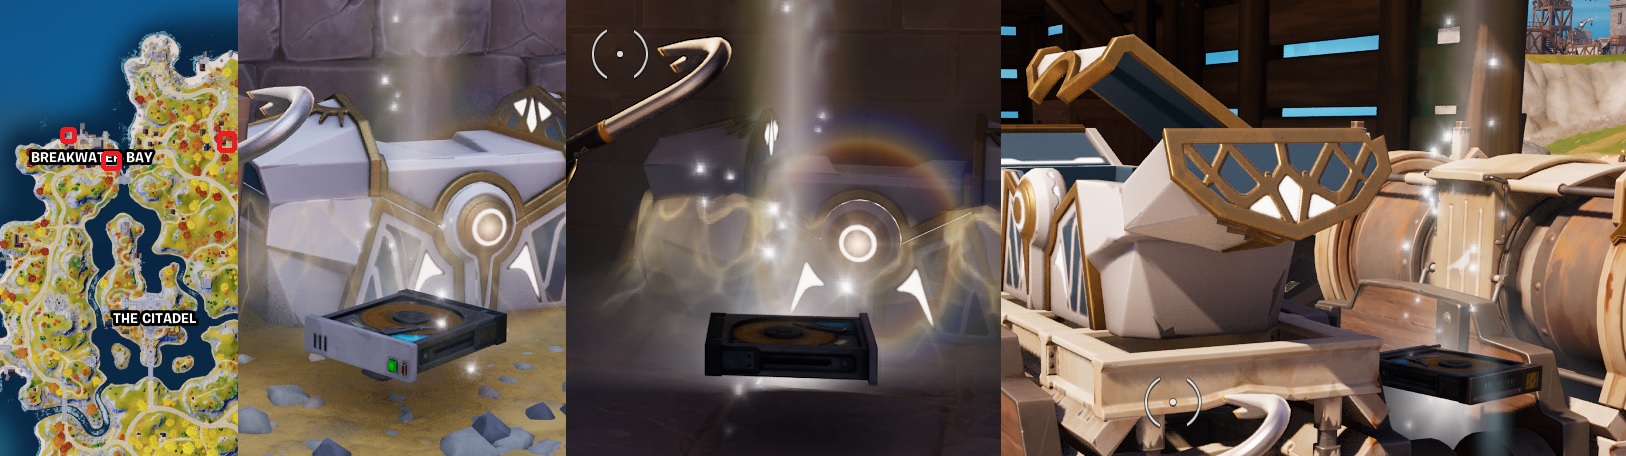
Find any Oathbound chests on the Island, you will need to find 3 different ones. Damage them slightly with your pick axe (2 swings) and you will receive the Hard Drive. Will still work on closed and opened chests.
Oathbound Bonus Rewards – Part 4.2 – Stage 2 of 4 – Damage Oathbound Chests to retrieve Hard Drives – Locations
I went for the 3 Oathbound chest up at Breakwater Bay. One on the pier, one in the base of the bridge like tower and one up by the Hireable Character, Renegade Shadow
Oathbound Bonus Rewards – Part 4.2 – Stage 3 of 4 – Search papers at Lonely Labs
Oathbound Bonus Rewards – Part 4.2 – Stage 3 of 4 – Search papers at Lonely Labs
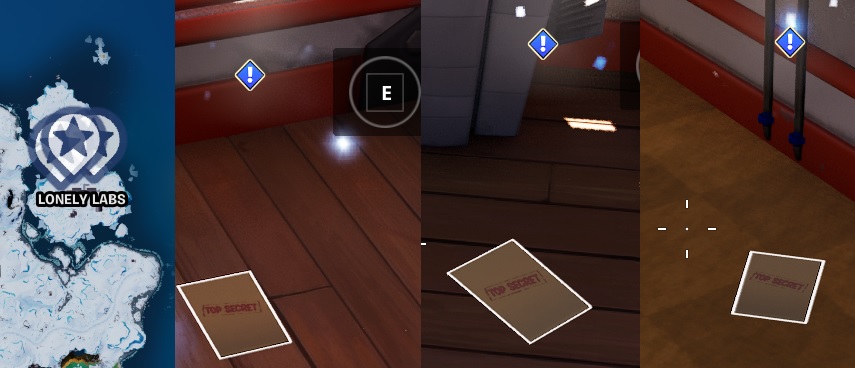
Head to Lonely Labs and in the Main Large Red Building, you will find the Top Secret papers on the floor.
Oathbound Bonus Rewards – Part 4.2 – Stage 3 of 4 – Search papers at Lonely Labs – Locations
Oathbound Bonus Rewards – Part 4.2 – Stage 4 of 4 – Search for ancient text at Shattered Slabs
Oathbound Bonus Rewards – Part 4.2 – Stage 4 of 4 – Search for ancient text at Shattered Slabs
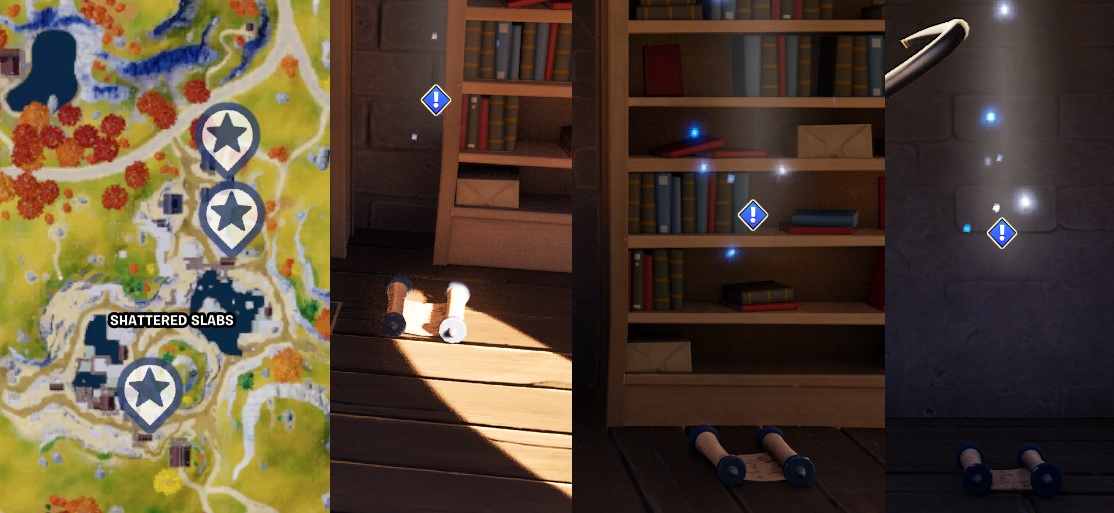
All the text scrolls can be found inside building at Shattered Slabs
Oathbound Bonus Rewards – Part 4.2 – Stage 4 of 4 – Search for ancient text at Shattered Slabs – Locations
Oathbound Bonus Rewards – Part 4.3 – Stage 1 of 3 – Make Contact with Rift Warden Stellan
Oathbound Bonus Rewards – Part 4.3 – Stage 1 of 3 – Make Contact with Rift Warden Stellan
Great bit of sight seeing on this quest, but more of the same, more making contact
Oathbound Bonus Rewards – Part 4.3 – Stage 1 of 3 – Make Contact with Rift Warden Stellan – Locations
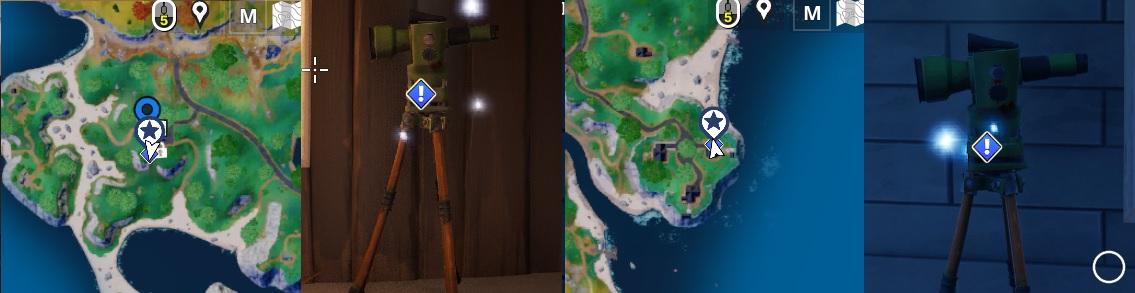
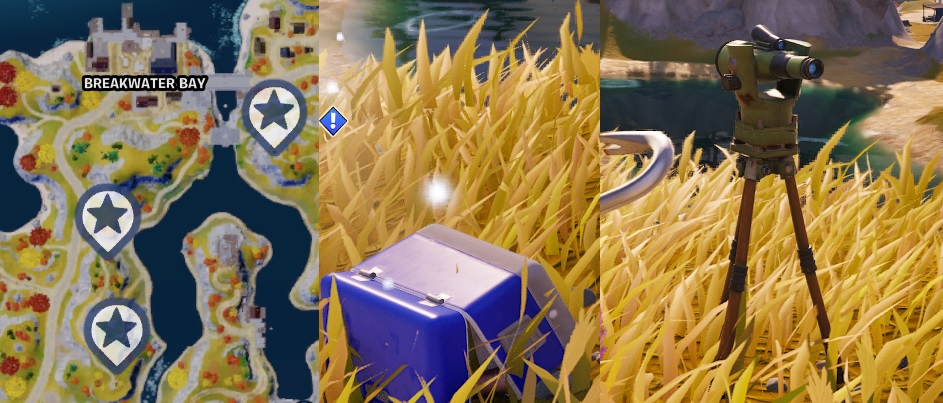
Oathbound Bonus Rewards – Part 4.3 – Stage 2 of 3 – Find a Telescope
Oathbound Bonus Rewards – Part 4.3 – Stage 2 of 3 – Find a Telescope
Two locations to select from, either will work just fine. The East most location has the NPC Character, Evie. She has the Shadow Tracker (Exotic) and will sell you a Rift for a quick trip to get back inside the circle
Oathbound Bonus Rewards – Part 4.3 – Stage 2 of 3 – Find a Telescope – Locations
Oathbound Bonus Rewards – Part 4.3 – Stage 3 of 3 – Clear debris and place telescope
Oathbound Bonus Rewards – Part 4.3 – Stage 3 of 3 – Clear debris and place telescope
Clear the logs and place the Telescope.
Oathbound Bonus Rewards – Part 4.3 – Stage 3 of 3 – Clear debris and place telescope – Locations
Conclusion
Well, over all the longest quest i have covered in Fortnite, it felt like it wnet on all season LOL.
Pros
Great story line
Visited areas i would have not normlay visited
Cons
Poor Rewards
Ending was a disapointment with no final reward
Some other Fortnite Guides to help you get Cracked